Raspberry Pi Zero installation on the Issue 4 mainboard
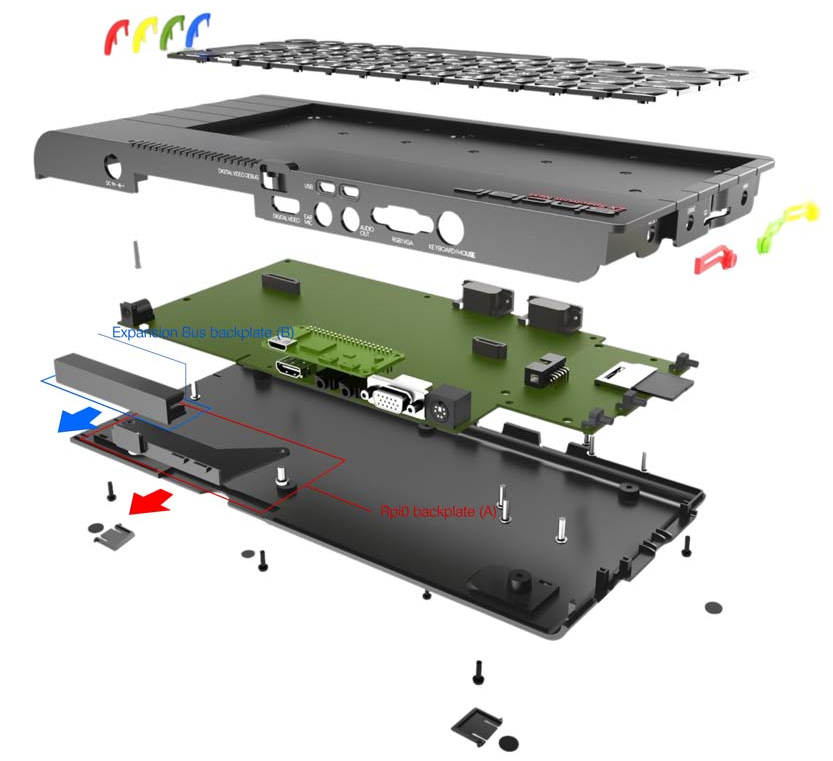
Expansion Bus backplate (B)
Rpi0 backplate (A)
Fig. 36 – Disassembled Next. Note the expansion port and Raspberry Pi 0 backplates
The RPi0 installation on the Issue 4 mainboard does not differ in any way from the one done for the Issue 2. So if you don't have an Accelerated Next, follow the instructions in the previous section as they apply here as well.
Notes
⚠
The diagram above (Fig. 36) shows a completely disassembled ZX Spectrum Next computer for illustrative purposes only. Not everything can be disassembled; the keyboard itself is considered a standalone unit, fastened onto the top of the case by 10 M3 x 4mm screws and YOU SHOULD NOT ATTEMPT TO DISASSEMBLE IT!!!
USER DISASSEMBLY of the Keyboard unit will NOT be supported by SpecNext Ltd and will invalidate the warranty!
Testing the add-ons' installation
Once you have your add-ons installed, it is time to test them; we'll start with the easier tests first and we'll progress to the most difficult ones.
ZX Spectrum Next User Manual, 3rd Edition (ISBN 978-1-5272-5496-1), written and illustrated by Phoebus R. Dokos. Copyright © 2020-2024 Phoebus Dokos / SpecNext Ltd. Licensed under CC BY-NC-SA 4.0. This is a transcription and can contain errors; check any doubt against the printed page.