Pages 157–205 · Markdown
Chapter 19 – NextZXOS and alternatives
Guide to NextZXOS
Until now, we have been talking about NextBASIC, the programming language with which you "talk" to your ZX Spectrum Next and get it to do things. Underneath NextBASIC however, lurks another program, one that allows your computer to communicate with the hardware devices connected to it and the world at large. It manages your computer's memory, makes sure your data is safe and accurate, that your programs behave as intended by their programmers and performs important "housekeeping" on your storage devices. This program is called an operating system and in the ZX Spectrum Next's case it is called NextZXOS.
NextZXOS, written by Garry Lancaster, is the direct successor to his +3e/IDEDOS, which in turn comes directly from the first proper Sinclair ZX Spectrum operating system called +3DOS which first appeared on the ZX Spectrum +3.
NextZXOS main features
NextZXOS extends +3DOS, +3e and IDEDOS and features the following:
- FAT16 and FAT32 support for industry-standard compatibility with mass storage devices while retaining IDEDOS/+3DOS compatibility for a full range of storage choices
- Long File Name (LFN)1 support
- Proper subfolders/subdirectories
- Memory Management facilities
- Virtual (container) file systems in disk and tape images2
- Installable device drivers
- Menu-driven file manager with extensible filetype associations/launchers
- esxDOS emulation layer for interoperability across ZX Spectrum compatible machines and extended dot command support
- Automatic execution of software on boot
- Command-line interface
- Streaming support
- Virtual memory support (swap partitions)
- Timekeeping facilities
- Availability of disk and file management even on legacy (via dot commands), 48K modes
- Increased compatibility with previous models of ZX family of computers3
- Support for a variety of snapshot formats
- Multi-lingual and multi-font capabilities
- Extended windowing facilities
- Increased speed of operation compared to the previous versions
- Proper CP/M4 3 compatibility
Unlike other operating systems, NextZXOS tightly integrates with the in-built programming language NextBASIC, to the point that it can be mistaken as being part of it. In reality however, NextZXOS provides two rich APIs (one being the native NextZXOS API and the other
1 Long File Name support means that a filename under NextZXOS can be up to 255 characters long as opposed to the earlier 11 (8 for filenames +3 for extension/filetype) character limit. LFN capability is not reserved for files. Folders can also be up to 255 characters long. Longer file and folder names help with the organisation of your files as it is easier to use more descriptive names. 2: A container file system / disk image is a bit-for-bit copy of the contents of a mass storage medium contained within a single file. For example what used to be an entire floppy disk can be represented by one file, which NextZXOS will access with traditional disk and file management commands once this is attached (mounted) by the operating system. 3: NextZXOS is compatible –via emulators provided by Paul Farrow– with ZX80 and ZX81 while also being more compatible than its predecessor with Timex Sinclair as well as the 128K and 48K lines of ZX Spectrum machines. 4: CP/M is an older operating system for personal computers with a vast library of software.
the esxDOS-compatible API) which can be used from machine-code or a language other than NextBASIC (for example C) to provide them with all the facilities needed for accessing your ZX Spectrum Next without having to write low-level access to the computer's hardware from scratch. The distinction is subtle and more easily discernible in facilities that are exposed to the 48K legacy mode of operation where the NextBASIC commands do not exist and their place is taken by the aforementioned dot commands.
In the following sections we will examine the NextBASIC usage of NextZXOS facilities before we extend the discussion to dot commands and the NextZXOS Command line so for the next few sections you can approach the subject as a NextBASIC topic if you feel more comfortable that way.
Let's however start by introducing topics in the order they will be needed in our discussion.
Notes
In this chapter, a lot of commands produce visual feedback that may be easier to see and understand on a 64 or 85 column display. Although NextZXOS menus are covered much later in the chapter, it may be of benefit to learn to use the Command Line in combination with the 32/64/85 option. You get to the Command Line menu either from the main NextZXOS menu or by pressing EDIT and navigating to it while in NextBASIC. Pressing EDIT again will allow you to select the 32/64/85 option which will cycle through all available widths until you find one that visually satisfies you.
Files, Drives, Partitions and Disks
Like most Operating Systems, NextZXOS uses the concept of Files to store data in a hierarchical organised set called a Drive identifiable by a Drive Name. This is the combination of a letter5 from A to P suffixed by a colon ie. d:, which in turn can be contained within a Disk. A file is any type of collection of data; Sprites, Arrays, NextBASIC programs, machine code, images or collections of the above. While NextZXOS via NextBASIC supports a finite set of file types, this set can be extended with the use of external programs and dot commands. For the following sections we will concentrate to what is available via NextBASIC and the provided dot commands with a brief discussion of how NextZXOS (and NextBASIC in turn) can be extended to handle more file types.
Files are usually organised in folders. While folders are not necessary for the storage of files, they are advisable as they help categorise and group files in a logical way, which allows them to be searched and accessed easily. That becomes apparent as your collection of files grows from a few tens to hundreds or thousands.
As mentioned above, files themselves are stored on disks, which are the physical devices that can be removed from the computer and whose contents are not lost like the main memory after each power cycle. Depending on the type of disk, there may be one or more data structures on it called partitions which as the name implies is a way to virtually organise the available space on the disk into smaller units. Partitions can be assigned to drives or sit unused –with or without data– invisible to NextZXOS (until a drive is assigned to them).
Apart from the physical disks, NextZXOS also allows the use of virtual disks and tape images. These are special files that contain an exact replica of the medium they simulate. They too, can be assigned to drives (see the footnote regarding tape images) as physical disks can and they appear to the user (and NextBASIC) as any other physical disk. There are some special considerations regarding these special files which we will visit further in this chapter.
Working with files
In our examples in the previous chapters we have already used files and specifically one particular type of file: NextBASIC programs. Even more specifically, we have SAVEd and LOADed them by using two commands: SAVE and LOAD.
5 NextZXOS cannot assign all letters in the range A to P as drives, since some are reserved; C: is always the boot drive, M: is the RAMdisk and T: (an exception to the A to P range) is the tape.
Apart from that basic functionality; we can also copy or move files from one location (folder or drive or a combination of both) to another location, rename them, erase them, and catalogue them; that is to produce a list of all the available files in a location. These functions are possible with the use of the COPY, MOVE, ERASE and CAT commands or their dot command equivalents: .cp, .mv, .rm and .ls6.
Filenames
Before we visit the commands that manipulate files, it's best we visit the subject of filenames first as there are special considerations on how and why a file is named.
First of all, filenames are basically strings that are made by up to four parts (according to which file system we use as we will see further below) that help NextZXOS to uniquely identify a file. These are:
- User Area with Drive Name –or–
User Area followed by a colon (:) character if accessing files on the same drive
–or– Drive Name - folder name or combination of folder names separated by forward (/) or backward (\) slash characters
- actual file name
- suffix of a dot (.) character followed by a file type of up to three characters (for example .bas)
Of these only the third part is absolutely required and every other part is optional. Also not every part is applicable everywhere in NextZXOS. This strictly depends on the kind of filesystem the files are located on. For example you can only use User Areas on virtual disk images, the RAMdisk and IDEDOS (+3e) partitions but not on FAT partitions (we will examine these a little later), while you cannot use folders in the RAMdisk and virtual disk images as the concept of folders doesn't exist there7. Similar for tape images or actual tapes where you can only use drive names (specifically t:) and up to 10 charactes as a filename but not folders.
Filenames can be up to 255 characters in length (inclusive of dot character and the optional type), however, for compatibility reasons on virtual disks, IDEDOS partitions and the RAMdisk, they can only be 8 (name) + 3 (type) characters in length (excluding the optional user area and drive letter combinations).
Finally, some characters are reserved and cannot be used to name files. Files can use the following characters:
- Letters: abcdefghijklmnopqrstuvwxyz (upper or lower case)
- Digits: 0123456789
- Other characters8: # $ @ ↑ _ { } ~ £
Upper and lower case letters are considered as having the same value for filenames, so EXAMPLE and example would be identical as far as NextBASIC is concerned. They will however be listed in the case they were stored in, when a catalogue is requested.
A filename can end with an optional type field which is just up to three characters9 long that you may wish to use in order to group together or quickly identify files of the same type. If a
6 SAVE and LOAD do not have dot command equivalents as they're already available in the 48K mode personality even though the latter was conceived prior to the introduction of mass storage devices to the ZX Spectrum family of computers. 7: Technically for floppy disk, IDEDOS and Tape virtual images as well as the RAMdisk slash characters can be a part of a filename but they're not an organisational unit as the folder is and since (as we'll see later) the filenames in these cases are restricted in size, it's not advisable to use them. 8: Characters " and ' are available in some situations (for example for tape images or for CP/M) for filenames but are reserved under NextBASIC and cannot be used directly. 9: Type fields, separated by a dot from the name field, are up to 3 letters long as a matter of both compatibility and convention. In reality, in FAT drives like the System/Next™ card your ZX Spectrum Next came with, there are no restraints on how many dots a filename can have but any filename with the dot character located at more than 4 characters before its end, is considered to have an empty type field (always keeping within the maximum allowed length of a filename). See also the discussion regarding wildcards to see why this useful to know.
type field is specified, it must be preceded by a dot. Unlike some other BASICs, NextBASIC does not automatically allocate a type to files if one is not specified.
You may find it useful to add your own types – a popular convention is to use .BAS to identify NextBASIC file types and .BIN or .COD to identify machine code file types.
NextBASIC already understands a number of popular types. Going to c:/nextzxos with the browser, placing the cursor over browser.cfg and pressing ENTER will return the most commonly used ones together with the action that will be taken when the Browser launches them.
The characters * and ? are called wildcards and have a special meaning to NextZXOS. They're used to substitute ranges of characters or specific characters in filenames and folders. We'll see why this is particularly useful further below.
The dot character . also has a special meaning according to how many we use. If we use one (.) it means this folder and if we use two (..) it means the folder one level up. Keep this information in mind as it will prove very useful in the examples we'll encounter.
The following are some examples of valid filenames:
- z
- squares
- m:picture.bin
- a:fred
- 13a:hello
- 0M:CAPITALS
- file name
- test.bas
- philip
- glass.mus
- a:a.a
- c:/nextzxos/browser.cfg
- c:\nextzxos\browser.cfg
- 7:dubious
while the filenames below are illegal and attempting to use them will produce an error:
- <>-+=!& (must not contain any of these characters)
- *test (cannot contain an asterisk)
- te?st (cannot contain a question mark)
Note that in the list above we've made two assumptions regarding valid filenames, and these are that drive names a: and m: are virtual disks and the RAMdisk respectively. User areas are acceptable parts of filenames ONLY if the drive's filesystem allows them; otherwise you will get an error.
With that information in hand, let's start examining below the main commands for working with files.
LOAD
LOAD as its name implies retrieves a file from a drive and puts it (loads it) in the computer's memory. Depending on how it was saved (in the case of NextBASIC programs) or named (in the case of machine code software) it may also execute it as well. It takes the form:
LOAD filespec [MODIFIER [options]]
where filespec is a filename as described in the previous section followed by an optional MODIFIER directive (SCREEN$, LAYER, CODE, DATA, INT, INPUT or BANK) which in turn may have optional parameters.
Regarding the filespec, this can be as simple as an empty string, however this has special meaning for tapes and disk images. Typing:
LOAD ""
will produce an F Invalid file name, 0:1 error. We'll revisit this promptly but first let's type:
LOAD "t:"
If you now repeat the previous command, you will see something changing on your screen, with its border turning red and the rest of the screen becoming blank. This simply means that your ZX Spectrum Next is expecting a tape to load! Indeed, finding a tape deck, connecting it to your computer and a ZX Spectrum program on tape, inserting it and pressing PLAY you will start seeing blue and yellow bars running down the border and the program eventually loading. What the series of commands we just typed did, is to first switch the default LOAD device to tape (that's denoted by the drive name T:) as opposed to the SD Card and then attempted to load the first program on the tape that it could find. Pressing SPACE or BREAK will return you to NextBASIC without loading anything. There is a shortcut of the previous series of commands in the form of the Tape Loader option in the NextZXOS Startup Menu. This is also the preferred way of loading tape-based software on your ZX Spectrum Next. Using LOAD with only a drive name as parameter will set the default drive to that drive and all file operations not having a drive name specified in the filespec will assume it.
We already learned that filespec can be only a drive name. There is one more special case and this concerns virtual disks. Obviously, unlike what happens with a tape, the concept of the first program you can find cannot exist on a random access medium like a disk, so LOAD "" will produce the error we saw when we first attempted it. In virtual disks however it is possible to give the command:
LOAD "*"
This will attempt to load a special file named *, or, in the absence of that, load a file called DISK. As we saw earlier, you cannot use NextBASIC to name a file * as this character is a wildcard; you can however save a file called DISK and this will be loaded and if saved with the appropriate SAVE option, will also execute. You can try this by pointing the Browser to c:/demos/NextBASIC/ and selecting demo.dsk as a virtual disk, when prompted to mount it, select A and then N (when asked if you would like to Autoboot it). Then just type the command above and you'll be greeted by a cheerful Hello World message.
A bit earlier, we discussed how wildcard characters can be useful. We saw how it is to use one as filespec in LOAD which as we said is reserved only for virtual disks. A variation to that which uses the * wildcard is the following:
LOAD "d*"
which will attempt to load the first NextBASIC file that starts with the letter d. We'll revisit wildcards further below as they're a very powerful tool for manipulating files.
So far we've examined LOAD with only the filespec option. This will load NextBASIC programs into memory, however with the optional use of MODIFIER directives, LOAD can display pictures, retrieve long data segments and load either code or raw data into memory.
One of the nice facilities provided by NextBASIC is the ability to store the screen as it's being displayed at a given moment, in order to be loaded later and redisplayed instantly, whether it contains graphics, text or both. There are two (plus one) ways that this can be achieved; first is with the use of SCREEN$ and second is with the use of the LAYER modifiers. Here we'll skip ahead as we haven't talked about SAVE yet but for the time being type the following:
10 LAYER 0
20 INK 3: PAPER 6: PRINT
   "Hello World!"
30 SAVE "test.scr" SCREEN$
and then RUN it. You will immediately be greeted by purple letters on yellow background.
Now type:
CLS:LOAD "test.scr" SCREEN$
Immediately, the same message as previously will appear on your screen. Now change line 30 and replace SCREEN$ with LAYER so it reads:
30 SAVE "test.scr" LAYER
and RUN it again. Then give the following:
CLS: LOAD "test.scr" SCREEN$:PRINT AT
2,2; "Press Any Key": PAUSE 0: CLS: LOAD
"test.scr" LAYER
and press ENTER. What you will see is two consecutive LOADs of the same image with an intermediate prompt to press a key. Before we explain what just happened, type one more thing:
LAYER 2,1: LOAD "test.scr" SCREEN$: PAUSE
0: LAYER 2,0: LAYER 0
This will produce a blank screen waiting for a keypress which when it comes will give its place to the screen you previously saved. Finally modify the above line slightly to be:
LAYER 2,1: LOAD "test.scr" LAYER: PAUSE
0: LAYER 2,0: LAYER 0
which will produce a garbled image and an error report End of file which will disappear once you press a key. Don't forget to manually turn off Layer 2 after that command because due to the error, the command did not fully execute. What has happened is that the LAYER modifier attempted to load a screen in the format supported by the current layer as set by the LAYER command (and then run out of data as the Layer 0 screen we saved is markedly smaller), while SCREEN$ exclusively loads screens in the format recognizable by Layer 0; That means that for Layer 0, LOAD ... SCREEN$ is functionally equivalent to LOAD ... LAYER but that doesn't apply to the other layers. LOAD filespec SCREEN$ and LOAD filespec LAYER do not store the current palette in use. If you haven't changed the palette at all and are using NextBASIC's standard colours, then you'll get the display you're expecting, however if you have changed the palette you may be surprised by the unintended effects this can produce. In order to get the active palette and store it in a file you will need to use the ZX Spectrum Next's NextREG facilities covered in Chapter 22 – IN, OUT and the Next Registers, or the very handy Save Palette function of the NMI menu covered later in this chapter. Additionally you cannot load screens in the shadow areas of the graphic subsystem. For that you will need the following LOAD modifier; CODE with optional parameters address, length. This essentially loads machine code programs and raw data into memory either in the address they were saved from, or in the address and length –in bytes– we specify. Keeping with the example above, type the following:
LAYER 0: LOAD "test.scr" CODE
Once again, you'll be greeted by the cheerful Hello World! screen we generated previously. To expand a bit on this first type:
NEW
After pressing ENTER, you'll be greeted by the NextZXOS Startup menu. Select NextBASIC and rewrite the line above by adding 16384,6144 at the end after the CODE to read:
LAYER 0: LOAD "test.scr" CODE 16384,6144
Amazingly, the Hello World! message reappears but this time colourless! Adding the two numbers after CODE instructed the computer to load the file in address 16384 (which is the start of Layer 0's graphics memory) but at a smaller length than the actual file we've stored, removing all the colour attribute information. Attempting to set a longer length than the size of the file we're loading, the computer will return an End of file, 0:1 message. Note here that doing just that is not a good practice and we should be using LOAD BANK, LOAD SCREEN$ and LOAD LAYER to load data into graphic memory.
As we saw in Chapter 11, one of the most tedious aspects of programming is to prepare arrays. They can involve endless typing via data statements and use a lot of program space which could otherwise be used for actual program logic. Thankfully NextBASIC gives us the option, after we've prepared an array, to save it to a file to be retrieved later, saving us both time and code memory. To load such prepared arrays we need to use the LOAD modifier DATA. This takes the form:
LOAD filespec DATA arrayname()
to load for example the array b() from Chapter 11 assuming we have already saved it as b-array.dat we'd only need to type:
LOAD "b-array.dat" DATA b()
This would find if any other array named b() was already stored in the computer's memory, erase it and replace it with the information provided in the file.
We can only load string and floating point arrays. Also of note is that the parentheses after the array name cannot be ommited.
Integer arrays cannot be loaded or saved with the DATA modifier. For that we need the following modifier INT.
LOAD filespec INT
will load previously saved integer arrays and variables. All arrays and integer variables will be initialised prior to loading and replaced with what is in the saved file. Additionally the INPUT modifier:
LOAD filespec INPUT
will load a previously saved definition of the keyboard joystick. See Chapter 14 and the INPUT function for more.
The final LOAD modifier BANK should be looked upon as a variant of the CODE modifier, as it basically loads raw data into memory in the bank number, offset in said bank and length (in bytes) we specify very much like CODE does. This takes the form:
LOAD filespec BANK number, [offset], [length]
Keeping with the example we have been using try:
LOAD "test.scr" BANK 5
will load and display the exact same screen, with the main difference that it will put it in offset 0 of bank 5. For reasons that will become clear in Chapter 23, this is exactly the same location as the one we used with SCREEN$ and therefore if you slightly modify the command to be:
LOAD "test.scr" BANK 5, 0, 6144
as previously, the file will appear colourless. When using BANK as a LOAD modifier, we need to remember that NextBASIC and NextZXOS do not care what type of data is being loaded. As such the BANK modifier is also used to load NextBASIC programs that make the use of banks. More about that below when we examine SAVE.
SAVE
Our computer's memory lacks permanence; whatever is stored inside it during operation disappears when we turn the power off. We need some means to store the information onto a medium that can hold it even when the power is off; this comes in the form of the SAVE keyword.
It follows the exact syntax of LOAD that we examined in the previous section and uses the same modifiers and parameters with an additional LINE modifier. There are a few differences from LOAD in behaviour however and we'll examine these immediately. Typing:
SAVE ""
will produce an F Invalid file name, 0:1 error even when our default drive is T: (tape). That's simply because even on a tape, files NEED to be named, otherwise we wouldn't be able to identify them!
As with LOAD, setting the filespec to a drive name (for example c:) will switch all NextBASIC file retrieval and storage operations to that drive from that point forward so for example:
SAVE "m:"
will make drive m: the default drive and won't actually store any information anywhere.
As we saw in examples in the previous section, SAVE filespec without a modifier (assuming filespec is a string specifying more than just a drive name) will save the NextBASIC program currently in memory onto the default drive or the drive/folder we specify. If however this filename already exists in the location specified, NextZXOS will first create a backup file made up from the original filename and then append the type .bak to it.
We will have to skip ahead again to see the results of our operations by using CAT (for CATalogue) so let's quickly do some typing:
SAVE "c:"

10  PRINT "Hello"
and then:
SAVE "hello.bas"
followed by
CAT "hello*.*"
(Never mind what the *.* means, we'll examine that later).
Your screen will display the following:
hello.bas                 1K

  980M free
Now perform the save again, again followed by CAT "hello*.*" and you'll see:
hello.bas                 1K
hello.bas.bak             1K
980M free
before we discuss what has happened, make a small modification to the program (for example add an exclamation mark after World on line 10 and do another save, a bit different this time:
SAVE "hello"
and follow it by CAT "hello*.*" . Now you'll see:
hello                     1K
hello.bas                 1K
hello.bas.bak             1K

  980M free
Repeat the last save command one more time and then do CAT "hello*.*" again. The screen now shows:
hello                     1K
hello.bak                 1K
hello.bas                 1K
hello.bas.bak             1K

  980M free
If you however, had started with a SAVE "m:" thus redirecting the default drive to the RAMdisk, everything would have been a bit different. First by not displaying a hello.bas.bak and now after the entire series of commands CAT would have returned:
HELLO                         1K
HELLO.BAK                     1K
HELLO.BAS                     1K

  59K free
so, why the difference? Let's take it from the beginning. We initially saved a NextBASIC program that was named hello.bas; then once we saved it again, the file with the same name on the drive had a .bak type appended to it. Then we saved the same program with a name without a type. In the second case since we were trying to save to a +3DOS filesystem (the RAMdisk), NextZXOS can only use 8+3 character filenames unlike the FAT filesystem that can have very long filenames. So in the second case, instead of appending the .bak type to the original hello.bas file, it stripped the .bas type and replaced it with .bak. What followed is, that we tried to save the same name without type but now NextZXOS had a decision to make; which filename with .bak type to keep? As you could easily find out by LOADing back the hello.bak file, the last version saved is the one retained. Your PRINT statement would be the one with the exclamation mark and not the one without.
This example, makes an important point that due to the disparate types of filesystems NextZXOS can handle, the auto backup feature provided is nice but it's not a panacea, so do not rely on it exclusively and instead name your files explicitly!
A slight variation of the SAVE command as it deals with NextBASIC programs is that you can add the LINE modifier with either a numerical parameter or a label name after it. For example saving the program above with:
SAVE "hello.bas" LINE 10
and then doing
LOAD "hello.bas"
will load AND start the program at line 10 or at the specified label10 which will then print Hello on your screen. As a matter of fact you can use even non-existing line numbers when saving. LOAD will go to the first available line after the one you entered if that doesn't exist in your program and attempt to run from there. If the line number you entered is higher than the last line number in your program, LOAD will just not execute the program, just simply loading it as if the LINE modifier was never specified. SAVE filespec LINE number will NOT accept a number greater than 65535 however and it will return a B Integer out of range, 0:1 error if such a value is supplied for number or 0:1 No Label error if the label doesn't exist.
It is noteworthy, that a particular type is not forced upon the file when using SAVE, so a NextBASIC file for example will not automatically carry the type .bas. That being said, as we saw earlier a standard set of types is known to the NextZXOS browser. These, help it automatically launch files using the appropriate commands. It is therefore a good idea to either adopt these, or modify the ones known to NextZXOS to be the ones you prefer. Remember however that every time you update System/Next™, the known associations to file types are being overwritten with the default ones, so always keep a backup of the browser.cfg file located in c:/nextzxos/ if you indeed make these changes.
As we saw earlier, storing screens requires the use of either the SCREEN$ (for Layer 0) or the LAYER (for all other layers) modifier directives. From our examples, you may have already assumed that the LAYER modifier this can also be substituted by the BANK or CODE modifiers. While this is true for Layers 0 and 1, there's no functional way this can be done for Layer 2 with CODE or BANK as the latter occupies more than one banks and CODE only works within the main memory map.
The most compatible way to save screens is therefore the use of the LAYER modifier directive as follows:
LAYER desired_layer
<statements generating graphical content>
SAVE filename.ext LAYER
Remember, that you must already be in the layer that you intend to save before initiating a SAVE...LAYER command. Also, as you can find from looking at browser.cfg, NextZXOS already recognises some types as belonging to a specific layer screen file. The table below lists them in order:
| Type/Extension | Layer |
|---|---|
| .SCR | ULA (Layer 0) |
| .SLR | LoRes (Layer 1,0) |
| .SHR | HiRes (Layer 1,1) |
| .SHC | HiColour (Layer 1,2) |
| .SL2 | Layer 2 |
Table 14 – Automatically recognisable screen file types
By this time and given the time we spent discussing the CODE modifier, you've probably figured out that it's not reserved for machine code programs and instead will save or load the raw data that's located in the memory address you specify whether this is graphics, machine code, a NextBASIC program, variables, NextZXOS system variables or just random numbers or even nothing (0s).
Unlike its LOAD equivalent, SAVE ... CODE requires both parameters, that is a legal address and valid length. It takes the form:
SAVE filespec CODE start_address, length
10 Labels can be anywhere in a line however SAVE filespec LINE @label will place the autostart pointer to the beginning of the line where the label is located and not at the location of the label.
where start_address can be any number from 0 to 65535 and length any number from 1 to 65535 and the sum of these should not exceed 6553611. CODE as discussed works only in the main memory (or rather in the main memory map) and for the rest of the memory we should use the BANK modifier. The main difference is that BANK is only 16K in size thus accepting a maximum of 16384 as offset12 and length. BANK can be used without an offset or length (but once an offset has been specified, the length parameter is required). Saving the contents of a bank takes the form:
SAVE filespec BANK number, [offset, length]
For NextBASIC programs that make the use of memory banks (as we'll see in Chapter 23), apart from the main program that can be saved with a simple SAVE command, you also need to save all the banks that contain parts of the program. It is therefore imperative to use SAVE...BANK on its own (without offset information) to make sure that all the NextBASIC parts are saved. As you will also see it's good practice to also assign banks when writing a NextBASIC program using variables so when you're loading them back you do not have to literally assign specific bank numbers as these can be reused by NextZXOS or a machine code program already in memory.
We already saw how we can use LOAD to load arrays into NextBASIC without having to enter complex DATA statements that have the potential of making our program hard to read. We SAVE arrays by using the DATA modifier followed by the array name (including parentheses) we wish to store for later usage. A few things we need to note are:
We cannot use a non-dimensioned array in our SAVE statement. For example if we do:
SAVE "data" DATA a()
we're more than likely to receive a 2 Variable not found, 0:1 error. Writing something like this:
DIM a(3): SAVE "data" DATA a()
however will save happily.
An already dimensioned array can be saved using a direct NextBASIC command or as part of a program but a saved array loaded using the command line or a direct NextBASIC command will NOT be available from your program unless it's loaded explicitly from it. Let's illustrate this point by writing the following little program:
10 DIM a(30)
20 FOR f=1 TO 30
30 LET a(f) = 30-f/f
40 NEXT f
50 SAVE "data" DATA a()
RUN the program and then type NEW to restart NextBASIC. Then type the following program:
10 FOR f=1 TO 30
20 PRINT a(f)
30 NEXT f
11 In reality NextBASIC, in order to retain compatibility with earlier versions of Sinclair BASIC, allows all valid integer numbers as both address and length. If you however include a non-valid length, you cannot be certain of what you're actually storing so make sure you verify that the locations you're storing are inside the actual memory map. 12: Using the term offset is more accurate than start address for a bank as it can move location in the memory map. Locations within a bank always start at 0 and that's common on all banks.
If you RUN the program you'll get a 2 Variable not found, 20:1 error, denoting that at line 20, NextBASIC has no idea what a means. Now without erasing the program give the following series of commands:
LOAD "data" DATA a():FOR d=1 TO 30: PRINT
a(d): NEXT d
You'll get the same series of numbers you stored with the previous program (before you typed NEW) on screen. If you however attempt to RUN the program you just typed the 2 Variable not found, 20:1 error will persist. In order to fix this, you will need to add the following line:
1 LOAD "data" DATA a()
which will produce the same effect as the direct command you gave earlier. You do not need to DIMension the array as LOAD will do that for you. It is also useful to note that it doesn't matter which array's data you saved since, when you load the same data back, you can assign it to any available array. So you could theoretically SAVE "data" DATA a() and LOAD "data" DATA b(). The only thing you need to remember is that the array type must match the data saved otherwise you will receive a b Wrong file type, 0:1 error.
Using the INT modifier with SAVE will store a snapshot of all your integer variables and arrays. All 24 integer variables and 24 integer arrays are saved regardless of if they contain data or not.
Finally the INPUT modifier used with SAVE stores your current keyboard joystick key assignments
VERIFY
When storing data on tape, in order to make sure what the program or raw data that you've stored is accurate, NextZXOS provides NextBASIC with the VERIFY command. On media other than a tape, VERIFY has no effect unless it's used in conjunction with a drive name in which case it will act like its LOAD and SAVE counterparts switching the default drive to the one specified. In every case, if not used on tape (drive t:), VERIFY will return 0 OK 0:1. VERIFY follows the same syntax as SAVE except for the LINE modifier. Assuming you have a tape deck attached to your ZX Spectrum Next, and having the Hello World! program we typed a little earlier, save the program into tape by giving:
SAVE "t:": SAVE "hello.bas"
Now we will try to make sure that the program was saved to tape properly by doing the following:
- Rewind the tape to just before the point at which you saved the program.
- Type...
VERIFY "hello.bas" - Play the tape. The border will alternate between red and cyan until NextZXOS finds the program that you specified, then you will see the same pattern as you did when you saved the program. During the pause between the blocks, the message Program: hello.bas will be displayed on the screen. (When NextZXOS is searching for something on tape, it displays the name of everything it comes across). If, after the pattern has appeared, you see the report 0 OK, then your program is safely stored on tape and you can skip onto the next section, Otherwise, something has gone wrong – take the following steps to find out what.
If the program name has not been displayed, then either the program was not saved properly in the first place, or it was but was not read back properly. You need to find out which of the two is true. To see if it was saved properly, rewind the tape to just before the point at which you saved the program, then play it back while listening to your audio output.
The red and cyan lead-in should produce a clear, steady high pitched note, while the blue and yellow information part gives a much harsher screech.
If you do not hear these noises, then the program was probably not saved. Check that you were not trying to save the program onto the plastic leader at the beginning of the tape. When you have checked this, try saving again.
If you can hear the sounds as described, then SAVE was probably alright and your problem is with reading back.
It could be that you mistyped the program name when you saved it (in which case when NextZXOS finds the program on the tape, it will display the mistyped name on the screen). On the other hand, perhaps you mistyped the program name when you verified it, in which case NextZXOS will ignore the correctly saved program and carry on looking for the wrong name, flashing red and cyan as it goes.
If there is a genuine mistake on the tape, then NextZXOS will display an R Tape loading error which means in this case that it failed to verify the program. Note, that a slight fault on the tape itself (which might be almost inaudible with music) can wreak havoc with a computer program. Try saving the program again, perhaps on a different part of the tape (or a different tape altogether).
MERGE
Many programmers like to store parts of their programs or special subroutines they want to use again and again, thus building libraries of code. Normally a subroutine will be part of a larger program but what if it could be used anew on a different kind of program? Normally you would have to load the entire program into memory, edit out the parts you do not need and then proceed to write the rest of the new program only leaving the part that you want to reuse intact. Similarly, there may be someone that only wants a routine to be used once into their program (for example during initialisation) and then exchange that space for another routine that performs a completely different task. The answer to both these issues is the MERGE command. MERGE is used in the same way as LOAD with the difference that it doesn't clear what's in memory already and does not erase the program's variables and instead only replaces lines that already exist. To illustrate this point consider this little program:
10 PRINT "Part 1"
20 PRINT "Part 2"
30 PRINT "Part 3a"
50 PRINT "Part 5"
Now save the program by giving:
SAVE "part-a.bas"
and then give the command:
NEW
After you re-enter NextBASIC and type LIST you will see there's no program in memory. At that point type:
30 PRINT "Part 3"
40 PRINT "Part 4"
60 PRINT "Part 6"
Now save this program also by giving:
SAVE "part-b.bas"
Finally load the first program again by giving:
LOAD "part-a.bas"
and doing LIST. What you're going to see is the first program as you expected. You should now type:
MERGE "part-b.bas"
and then type LIST. Both programs have mixed (merged) together with line 30 being the newer one. If you had done the procedure somewhat inverted, that is part-a.bas was merged into part-b.bas then line 30 of part-a.bas would be the newest one and it would have overwritten line 30 of part-b.bas saying PRINT "Part 3a" instead of PRINT "Part 3".
Like LOAD when used on tape (drive t:), MERGE does not need a defined filespec accepting instead just an empty string ("") and will just merge the next available program. Another good use of MERGE is instead of LOAD for programs that have been saved with the LINE modifier. MERGE will just load the program without executing it thus allowing you to edit instead of trying to use BREAK to stop execution. MERGE will not work with CODE, SCREEN, LAYER or BANK modifiers. To partly simulate that functionality, there's a dot command called .extract which we will visit later on. Finally, MERGE does not work with arrays (DATA).
Using NextZXOS
Thus far, we have examined the major commands we can use to get files into the computer's memory, as well as store the contents of the computer's memory into files but with the exception of a slight glimpse into rudimentary cataloguing of files on a drive, we do not actually know how to manage the files. The following sections will cover all the facilities provided for file and folder management by NextZXOS, together with their dot command equivalents (the latter work on both NextZXOS proper as well as 48K mode and some even work on esxDOS which we'll cover at the end of this chapter). We will also examine the remaining features of NextZXOS as the system itself does much more than simple file and folder management. Let's start by examining a few concepts that are necessary in order to get a better grasp of the commands that will follow and what these do.
Wildcards
Earlier, we touched briefly on the subject of wildcards. We mentioned two characters * and ?. Their meaning is as follows:
* Any number of characters up to the end of the Name part of the filename if used prior to a dot within the filespec –and– any number of characters remaining up to the end of the Type part within the filespec if used after a dot in the filespec
? Any single character
As a note to the above, it important to remember that the type part of a filename is recognised by NextZXOS as a valid one, only if it consists of up to 3 characters. If there are more than 3 characters it is considered to be a part of the name field and the type is therefore considered blank.
You cannot use more than two * within a filespec and each * must always be the last character in its respective field (Name or Type) in the filespec, otherwise a Bad Filename 0:1 error will be returned. Below are some examples of proper and improper usage of wildcards:
These will work:
*.* Any filename with any type
* Any filename without a type
*.? Any filename with any SINGLE LETTER type
*.??a Any filename with any type that ends in the letter a
a*.??? Any filename starting with a with any type
??a.?b? Any three letter filename ending with the letter a with a type having a b as second letter (for example dba.dbf)
While these won't:
*d.* * not the last character in the Name field
*.scr.* * not the last character in the Name field
*.*d * not the last character in the Type field
As it's apparent from the examples above, combinations of very few characters can represent a wide array of filenames which is exactly why wildcards are invaluable in managing our files.
Filesystems
We've also talked about filesystems; more specifically about FAT and IDEDOS/+3DOS but not specifically about what these represent. In a few words, a filesystem is a specific way of organising information that's located on a storage medium. There are filesystems that are medium–specific (for example even though it doesn't have a specific name, the way files are stored onto tape is a filesystem in itself) and filesystems geared toward general use. NextZXOS supports 3 (or rather 4) filesystems: the ZX Spectrum native tape filesystem, +3DOS (that comes from the ZX Spectrum +313 principally geared towards floppy disks), and two variants of the FAT filesystem, FAT16 and FAT32 (their main difference where NextZXOS is concerned is capacity). FAT is the de-facto standard filesystem for most modern removable media (like the SD cards the ZX Spectrum Next uses). Each filesystem has its pros and cons which affects slightly the way NextZXOS operates. As we've already noted earlier not all features are available on every supported filesystem; this obviously affects some of the features we'll examine below.
IDEDOS (which comes from the +3e) is not a filesystem in itself but a scheme that allows multiple +3DOS "partitions" to occupy a single physical disk, in order to facilitate the use of large media like hard disks.
Partitions
In the introductory notes and the Filenames section, we've mentioned the term partitions either by themselves or in conjunction with one of the filesystems mentioned above e.g. a FAT partition. This is a bit misleading and in reality it's an acceptable mashing of two terms: XXX filesystem type AND partition – a partition formatted with the XXX filesystem. In other words a FAT partition is a partition formatted with the FAT filesystem (could be either FAT16 or FAT32 – using FAT as a portmanteau term is acceptable use).
But what is a partition? Nothing more than an arbitrary slicing of available space on a storage medium, usually to make it more manageable. An SD card for example could have one or more partitions and not all of the same filesystem. Note here that NextZXOS will always start from the first FAT partition on the first SD card on the system. If you remember the initial discussion, drives can be assigned to partitions; this process of assigning a partition to a drive is called mounting and we will examine it right after we briefly examine storage devices.
Storage devices and disks
For NextZXOS a storage device can be physical or virtual. We use the term disk for both but the former refers to an actual, tangible piece of hardware like the SD Card reader your ZX Spectrum Next is equipped with, while the latter is nothing but a file containing the image of a filesystem. NextZXOS uses a common set of controls to address and access both types of disks. Physical disks are generally –with the exception of tape– assigned a number per device (ie. the primary SD card reader and secondary SD card reader have differ-
13 The +3DOS filesystem is identical to the CP/M one.
ent numbers) and each partition on each disk (if a partition exists) is assigned a number in turn. Virtual disks on the other hand do not have device numbers as they don't physically exist however both require a driver; that is a small program that sits between the disk and NextZXOS and translates each device's individual characteristics into the common set of controls that NextZXOS understands. That alone however is not enough; NextZXOS needs to assign a drive to each partition on a disk (or in the cases of virtual disks and the RAMdisk to the disk itself). As it comes with your System/Next™ distribution; NextZXOS knows three types of physical disks: SD Cards, the RAMdisk and floppy disks and two types of virtual disks: +3 floppy disk images and IDEDOS hard disk images. It also knows virtual and physical tapes both addressable via the reserved drive t:. Physical disk device numbers start at 0 and are assigned according to the table that follows:
| Device Number | Description |
|---|---|
| 0 | All IDEDOS partitions on the first SD drive |
| 1 | All IDEDOS partitions on the second SD drive |
| 2 | Reserved for First Floppy Disk drive |
| 3 | Reserved for Second Floppy Disk drive |
| 4 | RAMdisk |
| 5 | All FAT partitions on the first SD drive |
| 6 | All FAT partitions on the second SD drive |
Table 15 – Device Number assignments
On an unexpanded ZX Spectrum Next with an unmodified distribution of NextZXOS, the first used number is 4 which is the RAMdisk and the second is 5 as System/Next™ comes on an SD card containing only a single FAT partition. As seen on the table above, device numbers 2 and 3 refer to floppy disk drives (not yet supported by NextZXOS).
Mounting
In order for NextZXOS and NextBASIC to know how to access a partition or disk (be it physical or virtual) this partition/disk has to be mounted. That is the process where a partition on a device gets attached to a drive. If freshly installed, NextZXOS will automatically mount two drives; drives c: and m: the first being device 5 partition 1 (in other words the System/Next™ distribution's SD card plugged into the first SD reader of the system) and the second one being device 4 (the RAMdisk). On an initialised CP/M distribution (as we'll see further below) one more drive will be mounted and that's drive a: (assigned to cpm-a.p3d located inside c:/nextzxos/).
Generally speaking, if there are more than one FAT partitions detected on the SD card(s), they will be automatically mapped to drives c: onwards on startup.
Finally, any files located inside the c:/nextzxos/ directory, are mapped to the appropriate drives (if the drive in question has not already been mapped), if they are named as follows and are valid +3DOS partition images:
DRV-A.P3D
DRV-B.P3D
(…)
DRV-P.P3D
CPM-A.P3D
CPM-B.P3D
(…)
CPM-P.P3D
Virtual images named DRV-x.P3D (where x is a letter from a to p) have preference over virtual images named CPM-x.P3D so in the presence of both, the DRV-x variant will be mounted. Apart from the auto-mounting procedures described above; we can also manually mount partitions and disks. This will be covered a bit further below at its own section.
With all this information at hand, we can now proceed to examine NextZXOS facilities by task.
Drive cataloguing
It's obvious that simply remembering a file's name and LOADing it, is not possible after the first few files, so we need a command that can help us see which files are stored on a drive. This command is CAT (from CATalogue) and its syntax is as follows:
CAT [-] [#n[,]] [filespec] [EXP]
where - is a switch instructing the file list produced to use the short (8+3) format, #n is a NextZXOS stream for the output of CAT to be redirected to, filespec follows the conventions described in the filenames section earlier and the modifier EXP produces an expanded listing with more information about the files being listed. All CAT parameters are optional and by itself CAT will produce a listing of the default drive which can be set in the same manner as with LOAD, SAVE etc. Try the following:
LOAD "m:"
CAT
You will receive the following on your screen
No files found
   62K free

0 OK, 0:1
Congratulations, you just listed the contents of the RAMdisk. Sadly it's empty! Now type:
LOAD "c:"
CAT
Your display now will look similar to this:
DEMOS                    <DIR>
DOCS                     <DIR>
DOT                      <DIR>
GAMES                    <DIR>
MACHINES                 <DIR>
NEXTZXOS                 <DIR>
RPI                      <DIR>
SRC                      <DIR>
SYS                      <DIR>
TMP                      <DIR>
TOOLS                    <DIR>
LICENSE.MD                   6K
README.MD                    2K
TBBLUE.FW                  168K
TBBLUE.TBU                 465K

 1887M free

0 OK, 0:1
which is a slightly modified listing of the contents of the root folder14 of your System/Next™ distribution. Now type:
CAT EXP
14 In filesystems other than IDEDOS and +3DOS that use User Areas, files are organised in an inverted virtual tree of sorts, contained in folders like branches on a trunk of a tree which in turn contain smaller branches and so forth. The top level of the tree is called the root folder or root directory.
Your display now will look similar to this:
CORES                       d---
  2019-09-02 01:01
DEMOS                       d---
  2019-09-02 01:01
LICENSE.MD                  ----
  2019-09-02 00:07  5243
README.MD                   ----
  2019-09-02 00:07  1427
TBBLUE.FW                   ----
  2019-09-02 00:07  172032
TBBLUE.TBU                  ----
  2019-09-02 00:07  475648
You can immediately notice two things: First the addition of a column made from four characters at the rightmost side of the screen and secondly that every entry now occupies two lines with the second containing a date, a time and a number (not in all cases). Let's start from the second line. Two types of information is available there; when the file or folder was created and what's its size (in bytes). The first line is the file itself (or the folder) while the rightmost column describes the file's attributes. The d you can see in some entries is the directory attribute which designates a folder. Folders as far as the filesystem is concerned are special files without size. In the shorter form of CAT we saw previously, this is displayed as <DIR>. There are many more attributes to examine which we will look at later.
You may have noticed that the display gets very cluttered when using the EXP modifier especially if there are a lot of files with long names as the screen normally fits only 32 columns. If you follow the note in the beginning of this chapter and use 64 or 85 column modes. you'll see the situation improves. Switch to 64 column or 85 column mode, rerun CAT EXP and you will get something similar to this:
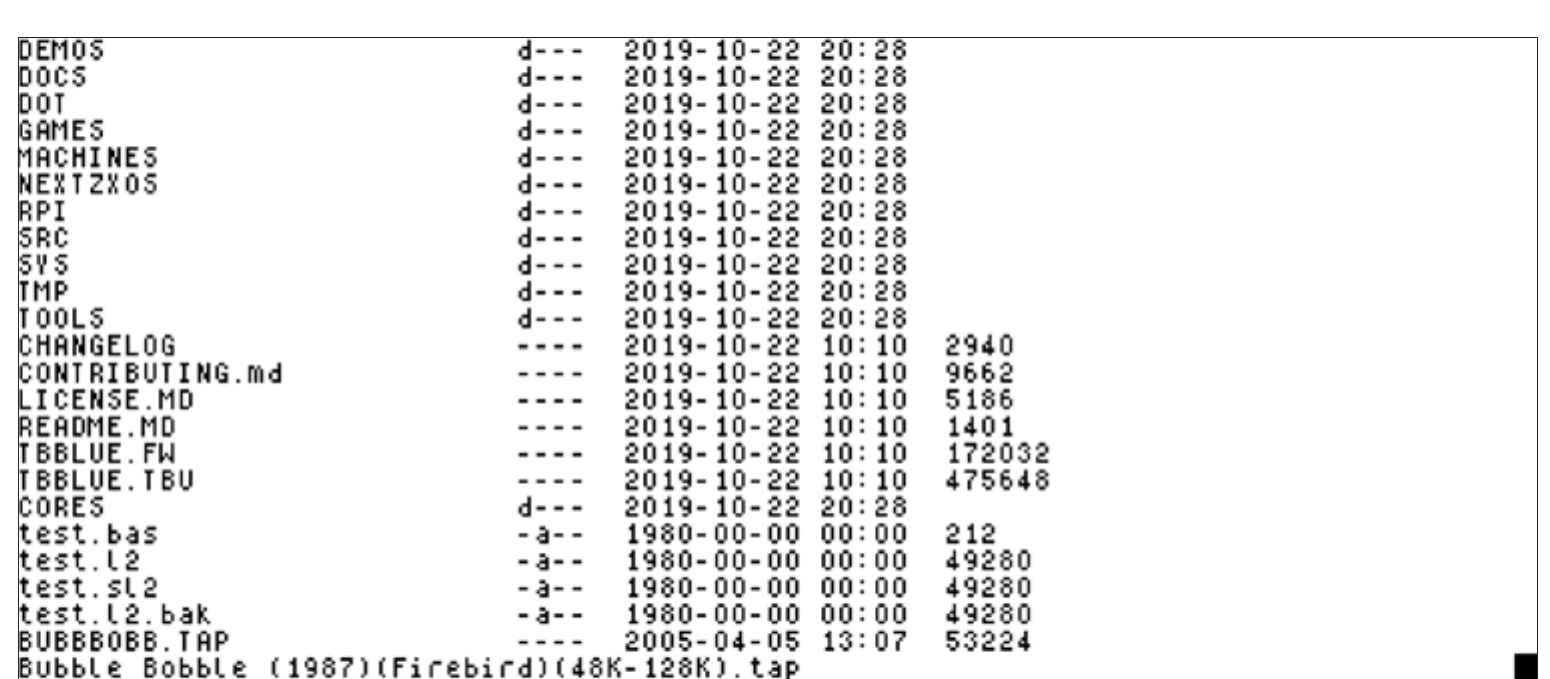
DEMOS                       d---  2019-10-22 20:28
DOCS                        d---  2019-10-22 20:28
DOT                         d---  2019-10-22 20:28
GAMES                       d---  2019-10-22 20:28
MACHINES                    d---  2019-10-22 20:28
NEXTZXOS                    d---  2019-10-22 20:28
RPI                         d---  2019-10-22 20:28
SRC                         d---  2019-10-22 20:28
SYS                         d---  2019-10-22 20:28
TMP                         d---  2019-10-22 20:28
TOOLS                       d---  2019-10-22 20:28
CHANGELOG                   ----  2019-10-22 10:10  2940
CONTRIBUTING.md             ----  2019-10-22 10:10  9662
LICENSE.MD                  ----  2019-10-22 10:10  5186
README.MD                   ----  2019-10-22 10:10  1401
TBBLUE.FW                   ----  2019-10-22 10:10  172032
TBBLUE.TBU                  ----  2019-10-22 10:10  475648
CORES                       d---  2019-10-22 20:28
test.bas                    -a--  1980-00-00 00:00  212
test.l2                     -a--  1980-00-00 00:00  49280
test.sl2                    -a--  1980-00-00 00:00  49280
test.l2.bak                 -a--  1980-00-00 00:00  49280
BUBBBOBB.TAP                ----  2005-04-05 13:07  53224
Bubble Bobble (1987)(Firebird)(48K-128K).tap
Fig. 19 – CAT EXP output in 85 columns
Similarly, the output will be even more pleasant at 64 columns:
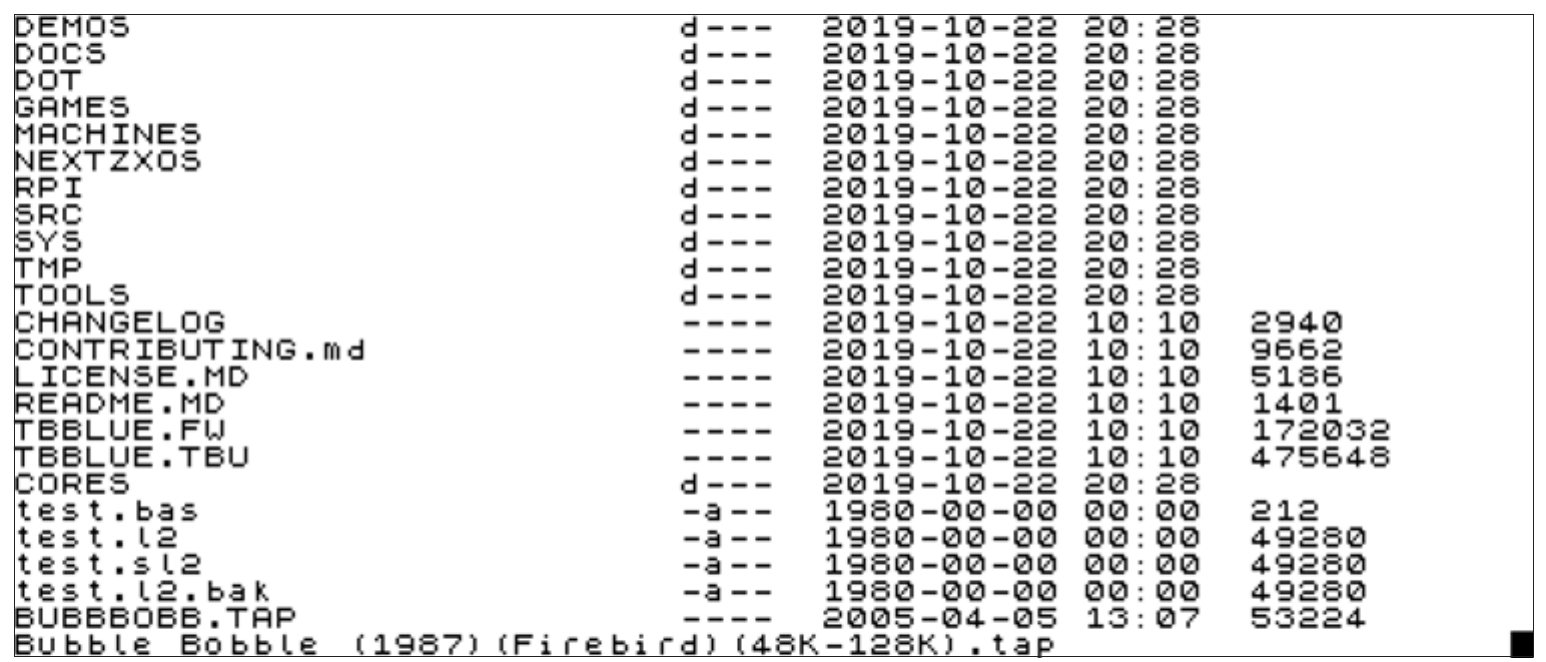
DEMOS                       d---  2019-10-22 20:28
DOCS                        d---  2019-10-22 20:28
DOT                         d---  2019-10-22 20:28
GAMES                       d---  2019-10-22 20:28
MACHINES                    d---  2019-10-22 20:28
NEXTZXOS                    d---  2019-10-22 20:28
RPI                         d---  2019-10-22 20:28
SRC                         d---  2019-10-22 20:28
SYS                         d---  2019-10-22 20:28
TMP                         d---  2019-10-22 20:28
TOOLS                       d---  2019-10-22 20:28
CHANGELOG                   ----  2019-10-22 10:10  2940
CONTRIBUTING.md             ----  2019-10-22 10:10  9662
LICENSE.MD                  ----  2019-10-22 10:10  5186
README.MD                   ----  2019-10-22 10:10  1401
TBBLUE.FW                   ----  2019-10-22 10:10  172032
TBBLUE.TBU                  ----  2019-10-22 10:10  475648
CORES                       d---  2019-10-22 20:28
test.bas                    -a--  1980-00-00 00:00  212
test.l2                     -a--  1980-00-00 00:00  49280
test.sl2                    -a--  1980-00-00 00:00  49280
test.l2.bak                 -a--  1980-00-00 00:00  49280
BUBBBOBB.TAP                ----  2005-04-05 13:07  53224
Bubble Bobble (1987)(Firebird)(48K-128K).tap
Fig. 20 – CAT EXP output in 64 columns
It's evident that the columns are really 4 and they only get broken down in two lines in order to fit. Let's now examine the use of the – switch. If you type:
CAT -
Your display now will look similar to this:
CORES   .                <DIR>
DEMOS   .                <DIR>
DOCS    .                <DIR>
DOT     .                <DIR>
GAMES   .                <DIR>
MACHINES.                <DIR>
NEXTZXOS.                <DIR>
RPI     .                <DIR>
SRC     .                <DIR>
SYS     .                <DIR>
TMP     .                <DIR>
TOOLS   .                <DIR>
LICENSE .MD                  6K
README  .MD                  2K
TBBLUE  .FW                168K
TBBLUE  .TBU               465K

 1887M free

0 OK, 0:1
As you can see, filenames are now clearly separated at the 9th character by a dot followed by a 3 letter type. In order to demonstrate what happens with a larger filename we could write a simple program and save it as follows:
10 PRINT "Hello World"

SAVE "This Is A Hello World Program.bas"
Then try both CAT and CAT - as follows:
CAT - "th*.bas": CAT "th*.bas"
(Here we're also demonstrating the use of wildcards for the first time). Your display will then be:
THISIS~1.BAS                  1K

 1887M free
This Is A Hello World Program.ba
s                             1K

 1887M free

0 OK, 0:1
you'll notice that the long filename This Is A Hello World Program.bas got truncated to its first 6 characters after trimming all space characters followed by a tilde ~ character and the number 1. This is to help differentiate from other files with long filenames that look alike in the first 8 characters of their filename (omitting spaces). To demonstrate this, type:
SAVE "This Is A Hello United Kingdom
Program.bas"
and
SAVE "This Is A.bas"
followed by
CAT - "th*.bas"
The resulting display will now be:
THISIS~1.BAS                  1K
THISIS~2.BAS                  1K
THISISA .BAS                  1K

 1887M free

0 OK, 0:1
As you can see a ~2 was added to the This Is A Hello United Kingdom Program.bas filename when it was shortened otherwise you couldn't differentiate it from the This Is A Hello World Program.bas as they both share the same starting characters. As a matter of fact NextZXOS when faced with a lot of similar filenames will keep adding consecutive numbers truncating the original filename further until all the files are displayed in short format. If you now use CAT with EXP you'll get to see a number of things. First, if you don't have a Real Time Clock module installed, you will see that all the files you just saved have the same date and time on them and secondly that in the second column, the second character from the left has turned into a from a single dash (-). This signifies that the archive attribute has been set. CAT becomes more powerful with the use of wildcards, allowing us to get a list of only the files we're interested in, omitting all others that may clutter our display. For example:
CAT "*.tap"
will show us all the .tap format tape image files, we have stored in the current drive and folder.
Thus far we have only displayed the ability to list files contained within the current drive and folder, however CAT can display files in different drives, folders, user areas or a combination of the above (when the combination is supported by the filesystem of the drive). We can instruct CAT to produce listings of files and folders inside drives other than our current drive or folder or even user area without having to change our default filespec to that specific area. We'll cover the subject of changing the default filespec shortly so for now here are some examples:
CAT "m:" Displays a list of all files in drive m:
CAT "2m:" Displays a list of all files in user area 2 of drive m:
CAT "2m:*.bas" Displays a list of all files ending in .bas in user area 2 of drive m:
CAT "c:/nextzxos/" Displays the contents of folder nextzxos found on drive c:
CAT "c:/nextzxos/e*.*" Displays all files whose filename starts with the letter e in the folder nextzxos on drive c:
CAT has two aliases in NextBASIC: DIR and LS. Both follow the exact same syntax so all the above applies to them. There are also two dot commands .ls and .lstap which are available on both NextZXOS proper and the 48K Basic mode available from the Startup menu. They replicate CAT and the combination of .tapein15 and CAT "t:" respectively. .ls has a lot more options available than CAT which can be seen once you type:
.ls --help
which will give you about 3 screens full of available options! For most purposes however it is used in the same manner as CAT filespec-wise. .ls does not require the filespec to be enclosed in double quotes if there is no drive specified (drives contain colon characters and both Sinclair as well as NextBASIC consider this as a statement separator and will complain). One major difference in the way .ls displays the files versus how CAT displays the files is that it uses the short format; ie. it's closer to giving CAT - than just plain CAT. Similarly, .lstap provides extra information than CAT "t:" provides as you will see by giving:
.lstap --help
.lstap is particularly useful in 48K Basic mode as there is no CAT "t:" equivalent in that version.
Drive, Folder and User Area navigation and management
One of the major features of any operating system such as NextZXOS is the organisation and management of files within the capabilities of its supported filesystems. In earlier times, such as when the predecessor models of the ZX Spectrum Next were first available, file storage needs were not as pressing as they are today.
Storage media couldn't really hold a lot of information and even program sizes were tailored to the memory available to the computers of the era. Operating systems in other words, weren't really needed unless one had very important business files to manage. As time went on and computer capabilities grew, the few files that could fit on a tape or a microdrive cartridge became the tens that could fit on a floppy disk while today with the capacities of storage media skyrocketing we have to manage tens or even hundreds of thousands of files. Compare a microdrive cartridge that held 90 KBytes of data which was a massive capacity for the times, to your System/Next™ distribution that can hold 176 million times as much.
Early on, once the first disk based systems became available, the need to organise files in a more logical way was recognised and the first type of grouping of files was realised in the form of 16 user areas (numbered from 0 to 15). User areas served other needs as well but for a machine like the ZX Spectrum +3 that introduced it to the ZX Spectrum line, it was a means to gather together files. User areas are more than adequate for limited capacity storage media but wholly inadequate for larger media like the multi-megabyte hard drives that followed.
To that effect the concept of a folder (also known as a directory) was introduced which in itself can hold other folders in a nested organisational chain. This structure is called a directory tree (it's really an inverted tree with the root of it sitting at the top).
The FAT filesystem used on your System/Next™ distribution is a prime example of that organisation. It's obvious that with folders being nested, constantly writing commands like SAVE or LOAD that includes the length of any number of folders in addition to the file's name itself can be very copious. To that effect apart from the commands that deal with the
15 .tapein is a dot command utility that lets NextZXOS assign a virtual tape image to the t: drive instead of the real tape
creation and deletion of folders, NextZXOS provides us with commands to navigate the filesystem's directory tree. The filesystem navigation and management commands are:
MKDIR
MKDIR (for MaKe DIRectory) creates a folder on a drive that supports it. It's syntax is as follows:
MKDIR filespec
where filespec follows the syntax already discussed in the Filenames section of this chapter using the first two parts that make up a filename: Drive and Folder. In the absence of a drive and an initial folder separator character, the folder you're creating will be created under the current folder and drive you've set. You can mix the folder separators \ and / without a problem when structuring the filespec. An attempt to create a folder with MKDIR in a filesystem that doesn't support it will report a Non Implemented, 0:1 error.
If you are using MKDIR with a depth of folders greater than one, the folder name you're using must already exist otherwise you will receive an Invalid path, 0:1 error. Here are some examples to illustrate:
MKDIR "/codes" Creates a folder named codes under the current drive's root folder.
MKDIR "/codes/codes" Creates a subfolder named codes under the current drive's root folder inside the codes folder. If there is no folder named codes under the root folder, the command will fail.
MKDIR "d:/test" Creates a folder named test under the d: drive's root folder
MKDIR "d:test" Creates a subfolder under the d: drive's last changed-to folder.
The last example is very interesting as it introduces the concept of current folder per drive. Indeed, NextZXOS maintains a list of which folder was last changed to on each drive and will switch you to that if you don't explicitly define a full pathname and only a drive. This will become very useful when copying as we will see later on.
There is a dot command equivalent of MKDIR, which shares its name apart from the dot prefix: .mkdir. It accepts two more, mutually exclusive options over MKDIR: --verbose and --help otherwise it's syntactically the same. As with most dot commands if there's no drive inside the filespec the double quotes enclosing it are optional.
RMDIR
RMDIR (for ReMove DIRectory) removes an empty folder from a drive that supports folders. Its syntax is as follows:
RMDIR filespec
where filespec is as discussed in MKDIR above. RMDIR protects you from accidental deletion of files that can be contained within the folder by returning a Dir full, 0:1 error if even one file or another folder is contained within. You will need to first remove all the files and subfolders located inside the folder before RMDIR allows you to remove the folder. Wildcards do not work with RMDIR; you cannot use RMDIR "*" and expect to remove all folders under the location you are in. Any attempt to do so, will return a Bad filename, 0:1 error.
Finally, if you attempt to use RMDIR with a folder that doesn't exist, you will receive a an Invalid path, 0:1 error.
.rmdir is RMDIR's dot command equivalent. It is a bit more destructive than RMDIR as it allows the deletion of parent folders with the addition of optional switch --parents, however, it too, checks for data inside the folders slated for deletion and will return an error if data exists. With the exception of the optional switches --parents and --help, syntax for both RMDIR and .rmdir is the same.
CD
CD (for Change Directory) changes the current drive and/or folder (for drives that support folders) or current drive (for drives that do not). CD's syntax is as follows:
CD filespec
where filespec consists of either one or two of the first two parts of a filename (Drive and Folder) for filesystems that support folders (FAT16, FAT32) or of just the Drive for filesystems that do not (+3DOS, IDEDOS). Setting just the current drive with CD is functionally equivalent to using SAVE, LOAD etc with just the drive as the filespec. Unlike folders, there is no way of setting a user area as the default one so if you need to address it you must do so explicitly through the filespec; for example add a 3m: prefix to filenames for files in the user area 3 of drive m:. CD works with wildcards by matching to the first folder in order it finds them and change to that.
CD also accepts three filespec shortcuts: . (single dot), .. (double dot) and one of the following / or \ (forward or backward slash). As we mentioned earlier in the chapter, single dot means: This folder, double dot means: The folder one level up and either slash on their own means: The root folder of the current drive. Single and double dot entries do not exist on the root folder and therefore you cannot use the shortcuts there.
Using a combination of the double dot and slash shortcuts, CD can also easily traverse the folder tree horizontally at the same level without having to write the entire path that precedes the level you're currently in. Obviously that doesn't make sense at the first level under the root as it would involve much more typing than the slash character alone but it works nonetheless!
Assuming a structure like the one in your System/Next™ distribution as partly displayed in the figure below, lets provide some examples of horizontal and vertical navigation.
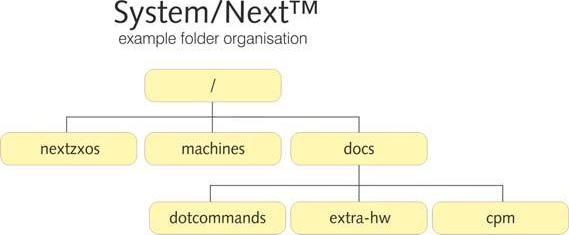
System/Next™
example folder organisation

                              /
                              |
        +----------+---------+---------+
        |          |                   |
    nextzxos   machines               docs
                                        |
                          +-------------+------------+
                          |             |            |
                     dotcommands    extra-hw         cpm
Fig. 21 – Folder tree navigation
Let's agree that we're located in the / of drive c: and we want to first go to c:/docs/cpm and then go to c:/docs/extra-hw before returning to / again.
We could use one of the following sequences:
CD "docs"
CD "cpm"
and then
CD ".."
CD "extra-hw"
and finally
CD ".."
CD ".."
or alternatively:
CD "c:/docs/cpm"
CD "c:/docs/extra-hw"
CD ".."
CD ".."
However it's much less typing to just do:
CD "/docs/cpm"
CD "../extra-hw"
CD "/"
It's easy to see that the navigational shortcuts are quicker. The dot command equivalent of CD is .cd with the optional switch --verbose which performs the functions of both CD and PWD (see below) in order. A small deviation from the syntax of CD is that it allows specific shortcuts to navigate quickly to the top folder of a deeply nested hierarchy.
These are:
.cd ... Functionally equivalent to two successive CD ".." commands
.cd .... Functionally equivalent to three successive CD ".." commands
.cd ..... Functionally equivalent to four successive CD ".." commands
PWD
PWD (for Print Working Directory) prints the current drive and folder to the screen or an optional stream number. PWD's syntax is as follows:
PWD [#n]
In a NextZXOS context PWD is very useful, however you cannot assign its output to a NextBASIC variable that easily for use inside our programs. In order to do that, one should be a little creative (skipping ahead to the next chapter) and use the optional stream parameter in a manner identical to the trick we used to get time from our RTC back in Chapter 17. Type:
DIM d$(255):OPEN #2,"v>d$":PWD #2:CLOSE
#2: PRINT d$
with which we define a fixed size string variable d$, then open stream 2 and assign it to channel V which redirects its output to d$. We then invoke PWD with output redirection to stream 2 which in essence takes its normal screen output and via channel v sends it to d$, before closing the stream and printing d$. We did exactly what PWD would do normally (that is print the working directory on the screen) but also managed to store it in a variable for use later.
PWD doesn't have a dot command equivalent with the same name. Instead you only need to use .cd --verbose without a filespec. The example above therefore becomes:
DIM d$(255):OPEN #2,"v>d$":.cd --verbose:
CLOSE #2: PRINT d$
You may notice that there's no stream defined after .cd --verbose and that's because you don't need it as stream #2 is the screen anyway! It's obvious that the same applies to PWD above but PWD does offer the ability to redirect to a stream and that illustrated that fact quite nicely. As a matter of fact, you can completely omit the stream from the PWD statement in the previous example and it will function in the same manner; you will see why in the next chapter.
Managing files and their attributes
In our examples in this chapter we have managed to clutter our drives with lots of copies of the same programs. This may be desirable at times but sometimes we may want to keep slightly altered versions of the same program in different places (for example to keep a type of version history) but we may not have the organisation of the folders we'll store the files in when we start working.
Other times we may want to get rid of some files we've created for any number of reasons, or rename a file from a throwaway name like for example test.bas to something more meaningful and finally we may want to move some files from one place to another when done with them. NextZXOS provides us with all these facilities in the form of the COPY, ERASE and MOVE commands and their dot command equivalents .cp, .rm and .mv.
We'll examine these below and additionally find how to modify file attributes (what is displayed as the second column in the CAT EXP command's output) again via a special version of MOVE and its dot command alternative .chmod. There is one more function provided by NextZXOS in regards to files and that's directly accessing its contents. This however requires the use of Channels and Streams and is therefore covered in the next chapter.
COPY
COPY does as its name implies; Copies a file from a location to another location. Its syntax is quite simple:
COPY source TO destination
A few notes, regarding the differences between source and destination parameters are:
First and most importantly, source can use wildcards while destination cannot. In other words you can write:
COPY "c:\*.bas" TO "m:"
but you cannot write:
COPY "c:\*.bas" TO "m:\*.bas"
or
COPY "c:\*.bas" TO "m:\a*.bas"
as any attempt to do so will generate a Destination cannot be wild, 0:1 error.
Secondly, copying files between filesystems with different capabilities will perform some form of translation to the filenames. To give an example with two files named raycaster.bas (longer than 11 characters) and ..later.bas (starting with two dots) on drive c: doing:
COPY "c:\*.bas" TO "m:"
will change the filenames to raycas~1.bas and later.bas as the RAMdisk is a +3DOS drive and as such accepts only 8+3 filenames.
Thirdly, the destination is not checked for if the files being copied already exist. So if you perform the above operation twice, each time COPY will replace the files on the destination without creating backup files except if the file named the same in the destination has the protected attribute set. To demonstrate let's skip a bit ahead and introduce you to an attribute setting command. Type the following:
COPY "c:/nextzxos/pisid.*" TO "m:"
MOVE "m:PISID.BAS" TO "+p"
COPY "c:/nextzxos/pisid.*" TO "m:"
The first COPY operation will succeed while the second COPY operation will fail. In the case of a mass COPY if the operation fails for any file, it will fail for all remaining files, so keep that in mind.
COPY does not work between a disk and a tape; doing for example:
.tapeout "test.tap"
COPY "m:*.bas" TO "t:"
will fail with a Destination must be path, 0:1 error. Note above the use of the .tapeout dot command which we will cover later on; it just allows us to substitute a tape image file for an actual tape. To perform the above function we will need to do the following:
.tapeout "test.tap"
LOAD "m:hello.bas"
SAVE "t:hello.bas"
and verify the output with .lstap we covered earlier:
.lstap "hello.tap"
(or alternatively not use .tapeout and .lstap at all and save onto an actual tape, in which case we'd use VERIFY to check if the file was actually written)
There is a special version of COPY where the source file is stripped of all control codes, just maintaining End-Of-Line characters (CR, LF or the combination of both – See Appendix A for all Control Codes). It exists as either shortcuts SCREEN$ and LPRINT in lieu of destination -or- as any stream that can be attached to a channel. The SCREEN$ shortcut gets any file and prints it on screen while the LPRINT shortcut gets any file and sends it to a ZX Printer or compatible. A good way to test the functionality is to check some of the documents in c:/docs. For example to see the pinouts of the Next board you can type:
COPY "c:/docs/extra-hw/pinouts/pin*.txt"
TO SCREEN$
while if you do:
COPY "c:/docs/extra-hw/pinouts/pin*.txt"
TO LPRINT
the file will be sent straight to the printer! SCREEN$ and LPRINT are shortcuts for their respective streams (as you will see in the next chapter). Although there are no shortcut keywords for other streams, if the destination is set to any stream, COPY's behaviour will be identical to what we just saw.
The dot command equivalent for COPY is .cp and its syntax is similar with the exception of the --force switch which allows overwriting of files without prompt. .cp CANNOT currently address +3DOS/IDEDOS drives so it should be only used on FAT partitions on the SD Card.
ERASE
Files can be deleted from a drive using the ERASE command. Its syntax is as simple as one would imagine:
ERASE filespec
where filespec follows the same conventions as CAT meaning that just like CAT, you can use the wildcards * and ? to identify a group of files, or you can specify the filename in full (including optional Drive and/or User Area and Path) if you only want to get rid of one par-
ticular file. ERASE offers you some form of protection if your filespec contains wildcards in the form of a question in which you will have to answer with a Y on the keyboard to continue or with N to stop, but offers no protection if you specify a single filename, which will immediately be erased from the drive – so exercise caution! If, for example, you wanted to delete a file from drive m: called FRED.BAS, you would use:
ERASE "m:fred.bas"
If drive m: has already been set as the default drive (by either using SAVE, LOAD… or even CD), then you don't need to include the m: at the start of the filename. It doesn't hurt to include the drive anyway, and with as powerful a command as ERASE is, you might feel safer if you do. To erase all the files on drive d: you would use:
ERASE "d:*.*"
Before doing this, NextZXOS will ask for confirmation by printing
Erase d:*.* ? (Y/N)
on the bottom of the screen and assuming that you really mean to wipe all the files from the disk in drive d:, you would then type Y.
If you attempt to delete a single file (or a group of files using wildcards) while there are no files on the drive that match the filespec a File not found error will be displayed.
The dot command equivalent to ERASE is called .rm (from remove) and its syntax follows that of ERASE with the exception of two switches namely --verbose and --help.
MOVE
MOVE is a very powerful command. It performs a total of five functions: moving and renaming files, changing file attributes and manually mounting and dismounting drives. Since there are separate sections for the last three functions; we'll cover only the first two here. For moving and renaming, MOVE's syntax is:
MOVE source_filespec TO destination_filespec
where source_filespec and destination_filespec follow everything discussed in the Filenames section earlier with the following considerations:
- You cannot use wildcards in either the source or the destination. This means that both source and destination have to be complete filenames.
- You cannot perform a MOVE operation between drives
Let's examine what will happen in the first case. Assuming you have 3 NextBASIC files, named HELLO1.BAS, HELLO2.BAS and HELLO3.BAS in drive m: (in the default User Area 0) and you want to move them to User Area 1, typing as you would probably expect:
MOVE "*.bas" TO "1:"
will fail with Bad Filename, 0:1. To perform this you should actually do:
COPY "*.bas" TO "1:"
followed by
ERASE "*.bas"
In the second case (and since we now learned our lesson we won't be using wildcards) attempting to MOVE one file between drives like so:
MOVE "c:/test.bas" TO "d:/test.bas"
will fail with No rename between drives, 0:1. To perform this you should actually do like above:
COPY "c:/test.bas" TO "d:/"
ERASE "c:/test.bas"
As you probably have already figured out, moving and renaming files is basically the same procedure and since we have to write an entire filename in both source and destination we can change it at the same time!
MOVE "hello1.bas" TO "c:/bak/hello.bak"
both moves locations and renames hello1.bas.
Imagine we have saved a file called FRED, and then after working on it and saving a new version with the same name, realised that we had made a terrible mistake and would like to recover the last version. This would be possible using the commands:
ERASE "fred"
MOVE "fred.bak" TO "fred"
If a file you're moving or renaming already exists (or rather another file with the same name) at the intended destination, MOVE will fail with an Already exists, 0:1 error.
MOVE's dot command alternative is .mv and unlike other dot command alternatives we've examined so far, its renaming and moving capabilities far exceed those of MOVE's. It allows operations across different drives, interactive or automatic overwriting of already existing files as well as the full use of wildcards. It's syntax is:
.mv [OPTION] [-T] source destination –or–
.mv [OPTION] source DIR –or–
.mv [OPTION] -t DIR source
Where source and destination can be any valid NextZXOS filespec (including wildcards) and DIR is any valid folder . Source or Destination filespecs with trailing slash characters (/ or ) are considered to be folders. As .mv has numerous options, they are listed in the table below to help you better understand what it can do. In general when you have a large quantity of files to be moved or renamed it's better to use .mv over MOVE.
| Option | Alt Option Syntax | Description | Notes |
|---|---|---|---|
| -b | Makes backup of existing destination | ||
| -f | --force | Do not prompt for overwrite | Of these three options, the last in order is the one that takes effect |
| -i | --interactive | Prompt for overwrite | |
| -n | --no-clobber | Do not overwrite | |
| --strip-trailing-slashes | Remove slashes from names | ||
| -S | --suffix=SUFFIX | Override default backup suffix with SUFFIX | |
| --system | Match system files to source | ||
| -t DIR | --target-directory=DIR | Move everything in source to folder DIR | |
| -T | --no-target-directory | Treat destination as a normal file | |
| -u | --update | Move only if source is newer than destination or destination doesn't exist | |
| -v | --verbose | Explain what is being done | |
| -h | --help | Prints this list of options | |
| -v | --version | Prints the version of .rm and exits |
Table 16 – .rm options
File attributes
As mentioned in the previous section, MOVE has another use besides renaming and moving files and that is to change a file's attributes. Attributes are bits of information associated with a file that tell you (and the computer) a little more about it. You already saw in the CAT EXP and ERASE examples how attributes appear to you and how they can affect your files. There are three attributes that can be changed plus one more that is automatically managed: write protection, system status and archive. The most useful attribute is, as
we've seen already, write protection. Once a file's write protection attribute has been set, it will not be possible to erase it (or save a file with the same name) until you remove it.
MOVE's syntax for attribute changing is a bit different from the one used for renaming/moving:
MOVE filespec TO +/-attribute
Where filespec CAN include wildcards unlike the previous case, and attribute is one of the following letters: p, a and s used with either a + or - prefix. The prefix serves as a set (for +) and unset/clear (for -). p is short for protection, a is short for archive and s is short for system.
Write protection is the most useful attribute for NextZXOS. Try:
MOVE "hello.bas" to "+p"
If you now try:
ERASE "hello.bas"
ERASE will fail with a File is read only error.
To switch write protection off type:
MOVE "hello.bas" TO "-p"
and you'll be able to erase the file as before.
As mentioned, we can use wildcards when changing attributes. As an example, to make all the files on drive m: write protected, you would type:
MOVE "m:*.*" to "+p"
As always, the drive letter can be omitted if it is the current default drive.
You can repeatedly switch attributes on or off without causing an error, so if you set write protect on a file that has already got write protection, it will just stay protected.
The second attribute we mentioned is the system status attribute. This is really provided just to be compatible with other CP/M based computers, however, if you do set a file's system attribute to on, you will see that the file no longer appears in the list when doing a normal CAT. It will appear however when using CAT EXP with an s marked in the second column and when using .ls. Try the following:
MOVE "hello.bas" TO "+s"
CAT
CAT EXP
LOAD "hello.bas": RUN
As you can see hello.bas became invisible to CAT but you can still LOAD it properly if you know its name. Bear in mind that you cannot have two files on the same disk with the same filename and different system status attributes; so if you try to create or copy a file onto a disk where a file of that already exists (but is hidden from CAT), then the previous file will be deleted, unless of course its write protect attribute is set.
The final attribute you can change is known as the archive attribute. In an expanded catalogue, it shows up as a. On other systems the archive bit is cleared when a copy operation has been performed, but that doesn't happen on NextZXOS. NextZXOS automatically sets the archive bit when saving on a FAT driver but doesn't do so on IDEDOS/+3DOS drives. It is therefore of no practical use and is only provided for file compatibility with CP/M.
If you try to use any letter other than a, s or p in setting or resetting attributes, or if the attribute option string is not two characters long, then you will receive an Invalid attribute error.
The dot command that handles attributes is .chmod and has a bit of a different syntax than MOVE as it accepts four attributes r, h, s and a, for read-only, hidden, system and archive. The first is in essence the same as p for MOVE while h doesn't exist on NextZXOS (setting the system attribute makes it also hidden by default) but it does exist as an attribute on FAT drives. Trying:
.chmod TBBLUE.FW -h
you will see that nothing has changed when doing CAT EXP. If you however take your SD Card to a PC, you will be able to see the file again there.
The RAMdisk
You may have been wondering what point there is in storing information in the RAMdisk (m:) as it will be lost once the ZX Spectrum Next is switched off. Well, perhaps its most obvious use is to store chunks of NextBASIC program (or routines) which can be merged (using MERGE "m:filename") into a smaller program, in sequence. This makes it possible to write about 90K of NextBASIC code, and hold it in the machine, without going into the more complicated BANK commands. Another little less obvious use is to store temporary files there that won't be needed when your program finishes. Memory is the fastest medium on your ZX Spectrum Next and quick access to files may be beneficial.
As we saw in Chapter 17, one of the more interesting uses of the RAMdisk is in animation, where a series of pictures can be defined by a slow NextBASIC program, stored in drive m:, then called back to the screen at high speed. Obviously BANK is still the preferred way to do it, but for quick jobs that use Layer 0 it's a quick and easy method!
Drive and Partition Management
We've talked about physical devices and virtual devices; we've also talked about the automounting features of NextZXOS but we haven't truly explored how the system manages storage devices and assigns them to drives. NextZXOS provides us with four commands to help us list and manage disks and drives. The drive and partition management commands are: CAT TAB that lists the physical storage devices attached to the system and what partitions they contain; CAT ASN that lists all drive assignments to whichever partition or disk (basically listing what's mounted), MOVE … IN to assign any device/partition physical or virtual to a drive (mount) and MOVE … OUT to remove an assigned partition from a drive as well as REMOUNT that allows us to change system disks on the fly. NextZXOS also provides us with a way to create virtual disks of varying sizes in the form of two dot commands: .mkdata and .mkswap
CAT TAB and CAT ASN
CAT TAB lists the storage devices currently connected to your ZX Spectrum Next and their partitions. It's syntax is:
CAT [#n] TAB
where #n is an optional stream to redirect the output to (e.g. to a file). On a standard ZX Spectrum Next with a single SD Card reader, giving
CAT TAB
will return:
MMC unit 0 (1024M)
MMC unit 5 (1024M)
5>1>NEXT           1024M FAT32
which illustrates also a point we made early in the chapter. Each SD Reader is assigned two device numbers (0,5 and 1,6 for first and second SD Readers respectively) according to what partitions it holds. If for example we had eight partitions, seven IDEDOS and one FAT32 then our display would have been:
MMC unit 0 (1024M)
0>PLUSIDEDOS          64K sys
0>General           4096K data
0>CPM-A              320K data
0>CPM-B              512K data
0>CPMStuff           512K data
0>Dev                256K data
0>Next               320K data
0>~~~~~~~~~~~~~~~~ 10304K FREE
24 free partition entries
MMC unit 5 (1024M)
5>1>NEXT            1008M FAT32
CAT ASN on the other hand, displays which partition or disk is assigned to which drive. The syntax is similar to CAT TAB:
CAT [#n] ASN
where, again, #n is an optional stream for the output to be redirected to. On a standard ZX Spectrum Next with a single SD reader and prepared CP/M (whose virtual drive a: as we have discussed would be already automounted), giving:
CAT ASN
would produce the following output:
A: ---Mounted FS---
C: 5>1>NEXT
M: 4>RAMdisk
If you are asking what happened to the IDEDOS partition we displayed earlier, it's not mounted because IDEDOS partitions do not auto-mount. To mount them (or any other partition or virtual/physical disk) you will need to employ the following commands:
MOVE ... IN, MOVE ... OUT and REMOUNT
In order to assign (mount) a disk/partition or virtual/physical disk to a drive you need MOVE ... IN. Its syntax is as follows:
MOVE drive IN mount_point
where drive is any valid NextZXOS drive (a: to p:) and mount_point is either a device>[partition][>][partition_name] or a filespec of a virtual disk. Devices that don't have partitions are written as X> where X is the device number, while devices that have partitions are written as X>Y>[partition_name] where Y is the partition number for FAT partitions and X>partition name for IDEDOS partitions. In the case of IDEDOS partitions the number can be totally omitted as well if on device 0. Assuming that we had unmounted the RAMdisk, in order to mount it again in some other drive, we'd need to do:
MOVE "o:" IN "4>"
Notice that there's no partition number following the 4> as the RAMdisk has no partitions. To mount a +3 disk image named mike.dsk located in c:/images/ into drive b: we would need to:
MOVE "b:" IN "c:/images/mike.dsk"
Whereas to mount an IDEDOS partition (for example one of the ones we examined earlier) you would have to:
MOVE "e:" IN "0>CPMSTUFF"
or
MOVE "e:" IN "CPMstuff"
Attempting to mount a drive that's already assigned will produce the error Already exists, 0:1. In order to do that, you'll first need to unmount the drive with MOVE ... OUT. The syntax is even simpler:
MOVE drive OUT
So to unmount the disk image from b: we just need to give:
MOVE "b:" OUT
You cannot unmount the c: drive and attempting to do so will report an In use, 0:1 error. You can however temporarily eject it (for example to write to it or just change it to a different version of NextZXOS, or even a game). Doing that without powering down or just arbitrarily, can damage your card beyond repair so you must be VERY careful. Since the potential for damage is great, NextZXOS has a special command to address that specific need called REMOUNT. Remount is given without any parameters and upon invocation it will prompt you to:
Remove/insert SD and press Y
Once you see the message you can eject your SD card, and when you reinsert it, press Y. NextZXOS will perform the same mounting procedure it performs on boot (for all drives) and your SD card contents will be safe!
Virtual filesystem management – .mkdata and .mkswap
As we've already demonstrated, NextZXOS can read unprotected +3DOS and IDEDOS virtual disks, but how are these made? There are two ways to do it: We can either create them externally using special imaging software or right on NextZXOS, with the use of a specialised dot command called .mkdata. Its syntax is as follows:
.mkdata filespec [size]
where filespec must follow the requirements set forth in the Filenames section for legal filenames omitting the drive and size is an optional number from 1 to 16 (in Megabytes). Leaving size blank, will select the default size of 16 Megabytes. You can use ANY filename, however only filenames with a .p3d type, named as described in the automounting section earlier in this chapter and located inside c:/nextzxos/ will be automounted. Here are some examples:
To make an 8 Megabyte automountable (as a:) virtual disk:
.mkdata /nextzxos/drv-a.p3d 8
To make a 16 Megabyte virtual disk that can be manually mounted in c:/images/:
.mkdata /images/disk.p3d
In order to make a virtual disk in a different drive you need to first change to it. For example:
CD "d:"
.mkdata /images/disk.p3d
will make a 16 Megabyte virtual disk image file named disk.p3d in d:/images/.
NextZXOS also supports virtual memory in the form of virtual swap partitions. These are similar to the virtual disk images with the difference that they cannot be mounted as drives. You can make virtual swap partition images with the .mkswap dot command which follows the same syntax as .mkdata.
.mkswap filespec [size]
To make an 8 Megabyte virtual swap partition image named swp-0.p3s you will need to give:
.mkswap /nextzxos/swp-0.p3s 8
Swap partitions named swp-0.p3s to swp-9.p3s which are present in the c:/nextzxos/ folder will be available for machine-code application programs to use (via the IDEDOS API).
Printing
NextZXOS supports printing via ZX Printer, Timex Sinclair 2040 and compatibles like the Alphacom 32. It also supports printing via the WiFi module – if one is installed – and you have access to a Pipsta™ printer or a printer compatible with D. Rimron's PrintShop as found on: https://github.com/StalePixels/PrintShop.
To print a listing you only need the LLIST command while to print any string to the printer you need to use LPRINT. Layer 0 and Layer 1 screens can also be printed by using the COPY command given by itself with no options. In order to demonstrate this we will have to jump a bit ahead. Load one of the games from c:/games/Classic48/ (preferably one with a loading screen). Once you see the screen press the NMI button on the left side of your ZX Spectrum Next. A menu will appear. Using the cursor keys go to the Screenshot menu and press ENTER. Select Standard and Press ENTER. Press SPACE and type in a name (for example: test.scr) Press ENTER again and then press the reset button on the side of your computer or F4 on your keyboard. Re-enter NextBASIC and navigate to the location you were in. Then do the following:
LOAD "test.scr" SCREEN$:COPY
The screenshot will print on your printer!
Since you're undoubtedly observant you may have seen the Print item in the Screenshot submenu when you pressed the NMI button. That will do the exact same thing! But more on that in its own section below. There are also, other ways to print which we will examine in the next chapter.
The SPECTRUM command
There is a command that's a bit of a jack of all trades; it can switch modes, load programs in various snapshot formats, change colour schemes, adjust the displayed columns for the editor and finally control and adjust the screensaver16 function! Let's start with the simplest iteration of SPECTRUM which is the command without any options. This will take us into 48K mode preserving any NextBASIC program we have in memory but losing all Next mode features except for the dot commands which will be still available. If the program you have loaded in memory is using specialised NextBASIC features, LIST may produce gibberish (like graphics in the place of where commands would have been) and running it will probably produce a C Nonsense in BASIC error. Let's demonstrate. Type:
LOAD "c:/nextzxos/mounter.bas"
LIST
SPECTRUM
LIST
RUN
If you are in the standard ZX 48K mode, you will need to know the keywords, printed on your keyboard, but assuming you can find where CAT is (Press EXTEND then SYMBOL SHIFT and 9), type:
CAT
You will receive an O Invalid stream, 0:1 error. That's because 48K ZX Basic is unaware of any mass storage medium except for the ZX Microdrive and CAT is made to work with
16 A screensaver is a protective function for your display. Some displays can damage themselves if they are displaying the same picture for a prolonged period of time. A screensaver program, produces movement on screen automatically after a period of inactivity to prevent that type of damage.
that. In order to actually see what's on your drive, you will need the dot command equivalent of CAT, .ls. Indeed typing:
.ls
you will once again, see what's on your drive.
Once SPECTRUM is used to change to 48K Mode, you cannot return to the Next mode using a command (as SPECTRUM does not exist in 48K BASIC). Instead you will have to reset your machine, using either the Reset button on the side of the computer or by pressing NMI together with 1.
A more complex iteration of the command is the following:
SPECTRUM filespec
This command loads a snapshot file in the popular .z80, .sna, .snx17, .p and .o formats and runs it. 48K, 128K as well as ZX80 and ZX81 snapshots are supported. Here are some examples:
To load the ZX81 classic 3D Monster Maze:
SPECTRUM "/games/zx81/3dmm/3dmonstermaze.p"
To load Pogie in Dreamworld Demo:
SPECTRUM "/games/next/pogie/pogie.snx"
To load Darkstar:
SPECTRUM "/games/classic128/
     darkstar.z80"
Two more specific variations of the basic SPECTRUM command are:
SPECTRUM LOAD
which switches to the ZX Spectrum 128K compatibility mode and invokes the Tape Loader and
SPECTRUM 48
which switches to the ZX Spectrum 48K compatibility mode, without any access to 128K hardware features. Both of those are mostly of use to the .TAP/.TZX/Tape Loaders included with NextZXOS.
To change colour schemes for the NextBASIC Editor, SPECTRUM can be used with one of the following modifiers: INK, PAPER, FLASH, BRIGHT and ATTR (which sets all the previous ones in one command). The syntax is as follows:
SPECTRUM MODIFIER n
where MODIFIER is one of INK, PAPER, FLASH, BRIGHT or ATTR and n is a standard colour from 0 to 7 when using the INK and PAPER modifiers, 0 to 1 for disabled or enabled when using the BRIGHT and FLASH modifiers, or calculated as: (128*flash)+(64*bright)+(8*paper)+ink for the ATTR modifier. Here are some examples:
SPECTRUM INK 4:SPECTRUM PAPER 0
or
SPECTRUM ATTR 4
17 The .snx type is essentially the same as .sna but instructs SPECTRUM to load the snapshot using some Next mode settings (as for example ZXN DMA instead of Z80 DMA) as it prioritises features over compatibility.
both set the NextBASIC Editor colours to green ink on black paper. You can see how the second one is derived by doing the following calculation: (128*0)+(64*0)+(8*0)+4
SPECTRUM PAPER 1:SPECTRUM INK 6
or
SPECTRUM ATTR 14
set the NextBASIC Editor colours to yellow ink on blue paper. Try to figure out how the second variation works!
The colour scheme applies to the standard 32-column editing mode as well as the hi-resolution 64/85 column modes. However, since Layer 1,2 only allows 8 different colour schemes, the scheme used is the one with the same PAPER colour as standard mode.
SPECTRUM can also be used with the CHR$ modifier to set the number of columns in the NextBASIC editor. Its syntax is:
SPECTRUM CHR$ n
where n is one of 32, 64 or 85 for the available column modes. To switch for example to 64 column mode you should type:
SPECTRUM CHR$ 64
Attempting to enter a value other than 32, 64 or 85 as parameter will produce an Integer out of range, 0:1 error.
Finally, SPECTRUM used with the modifier SCREEN$ can control the NextZXOS screensaver behaviour. The syntax is as follows:
SPECTRUM SCREEN$ n,t
where n is the type of screensaver (0 = bouncing box, 1=blank screen) and t is the timeout in minutes from 0 to 127. If t is 0 then the screensaver is disabled until the next reset. The screensaver will activate (after the selected timeout) whenever the machine is waiting for a key to be pressed under the following circumstances:
- In menus, Browser, Calculator, NextBASIC Editor or while in the Command Line
- During INPUT statements
- During PAUSE 0 statements
- When NEXT #n,var is waiting for a keystroke from the K, S or W channels
- When executing machine-code software that uses the IDE_BROWSER call, or the IDE_STREAM_IN call (accessing K, S or W channels) or an IDE_BASIC call accessing the previously listed NextBASIC statements.
The screensaver will not activate when games are being run (unless they use the API calls listed above), or in 48 BASIC.
Speed Control
The ZX Spectrum Next has a much faster CPU than its predecessors operating in one of the following speeds: 3.5MHz (same as the original ZX Spectrum), 7MHz, 14MHz and finally 28MHz. NextBASIC by default will set the CPU to execute at 3.5MHz, a setting which can be changed using either the left and right cursor keys while in any NextZXOS menu or directly from NextBASIC by using the RUN AT command. The syntax of the latter is as follows:
RUN AT s
where s is a number from 0 to 3 (0=3.5 MHz, 1=7 MHz, 2=14 MHz and 3=28 MHz). For example, to execute a program at 28 MHz begin the program with a:
1 RUN AT 3
NextBASIC Editor and Program support commands
NextZXOS provides a few direct commands, that allow NextBASIC programmers to control both the appearance as well as the flow of their programs. These are:
ERASE [first, last]
erases all lines between first and last (inclusive) keeping any variable intact. ERASE on its own deletes the entire program (still keeping all variables intact) and unlike it's parameter version, can be included in a program (see the autoexec.bas section below for an example).
LINE first, step
renumbers the program starting at line first using a predefined step. Let's assume a small program:
10 FOR f=1 TO 10
20 PRINT f,
30 NEXT f
If we now give:
LINE 2,3
The program becomes:
2 FOR f=1 TO 10
5 PRINT f,
8 NEXT f
It's obvious that we can pack as much "program" as we can in the amount of lines NextBASIC allows once our program is finalised. This should not be confused with the direct command
BANK n LINE first, last
which copies all lines in the main program between first and last to BANK number n. More on all bank-related commands can be found on Chapter 23.
LINE MERGE first, last
performs an even nicer optimisation to our typed programs, merging lines together to form a longer line, thus freeing lines for use. Assuming the program above, type:
LINE MERGE 2,8
the program then becomes:
2 FOR f=1 TO 10: PRINT f,:
  NEXT f
Obviously LINE MERGE makes our programs less readable but let's us pack them even more allowing for even more line numbers to be freed.
BANK n MERGE
copies a banked program back into the main program (more details on Chapter 23) erasing everything that's already there with the same line numbers. For example, in the above LINE MERGE example, EDIT line 2 to be also line 4 by going over line number 2, deleting it and replacing it with a 4. Then do the following:
BANK NEW a
BANK a LINE 2,2
ERASE 2,2
LIST
and finally:
BANK a MERGE
You'll see that the line you erased with ERASE 2,2, is back into place
NextZXOS also provides one more command we've already seen but haven't sufficiently explained yet:
[BANK n] LIST [#c] [PROC name()]
which just lists the program (and optionally redirects its output to a stream) that's currently in memory. Optionally LIST can produce the list of the program that's currently in BANK n, or list a program whether banked or not starting with the procedure name()
%CODE
NextBASIC options are controlled by the special %CODE integer variable. This is reset to zero when a program is loaded/run.
Currently available options are:
| Bit | Use |
|---|---|
| 0 | if set, %RND n and RND(n) return values between 0..n, rather than 0..–1 |
| 1 | if set, the BREAK key is disabled |
The Browser
In order to allow easier navigation of your files, NextZXOS comes with the Browser, a program that allows you to do so in a visual way. The Browser features the following:
- Easy navigation of drives and folders
- File management facilities: copying, erasing, renaming and moving of files
- Quick virtual disk mapping
- Automatic launching of known file types
- Extensible architecture for launching
- Cursor key or joystick navigation
The Browser is launched by using the EDIT key to bring up the NextZXOS menus or directly upon bootup by selecting the first entry in the NextZXOS Startup menu.
The Browser Window
Once the menu is selected and ENTER is pressed, the screen changes to the Browser window containing a list of the files located in the default drive and folder (as set by the CD, LOAD, SAVE, MERGE or VERIFY commands in NextBASIC). Normally upon initial boot this will be c:/ but subsequent runs without a complete power down may show different locations reflecting the last drive and folder set as default. Note that you do not need to switch to NextBASIC to set a default drive and folder. Whatever you select with the Browser has the exact same effect for NextBASIC, as giving one of the aforementioned commands.
The Browser window consists of five separate areas, as seen in the figure below:
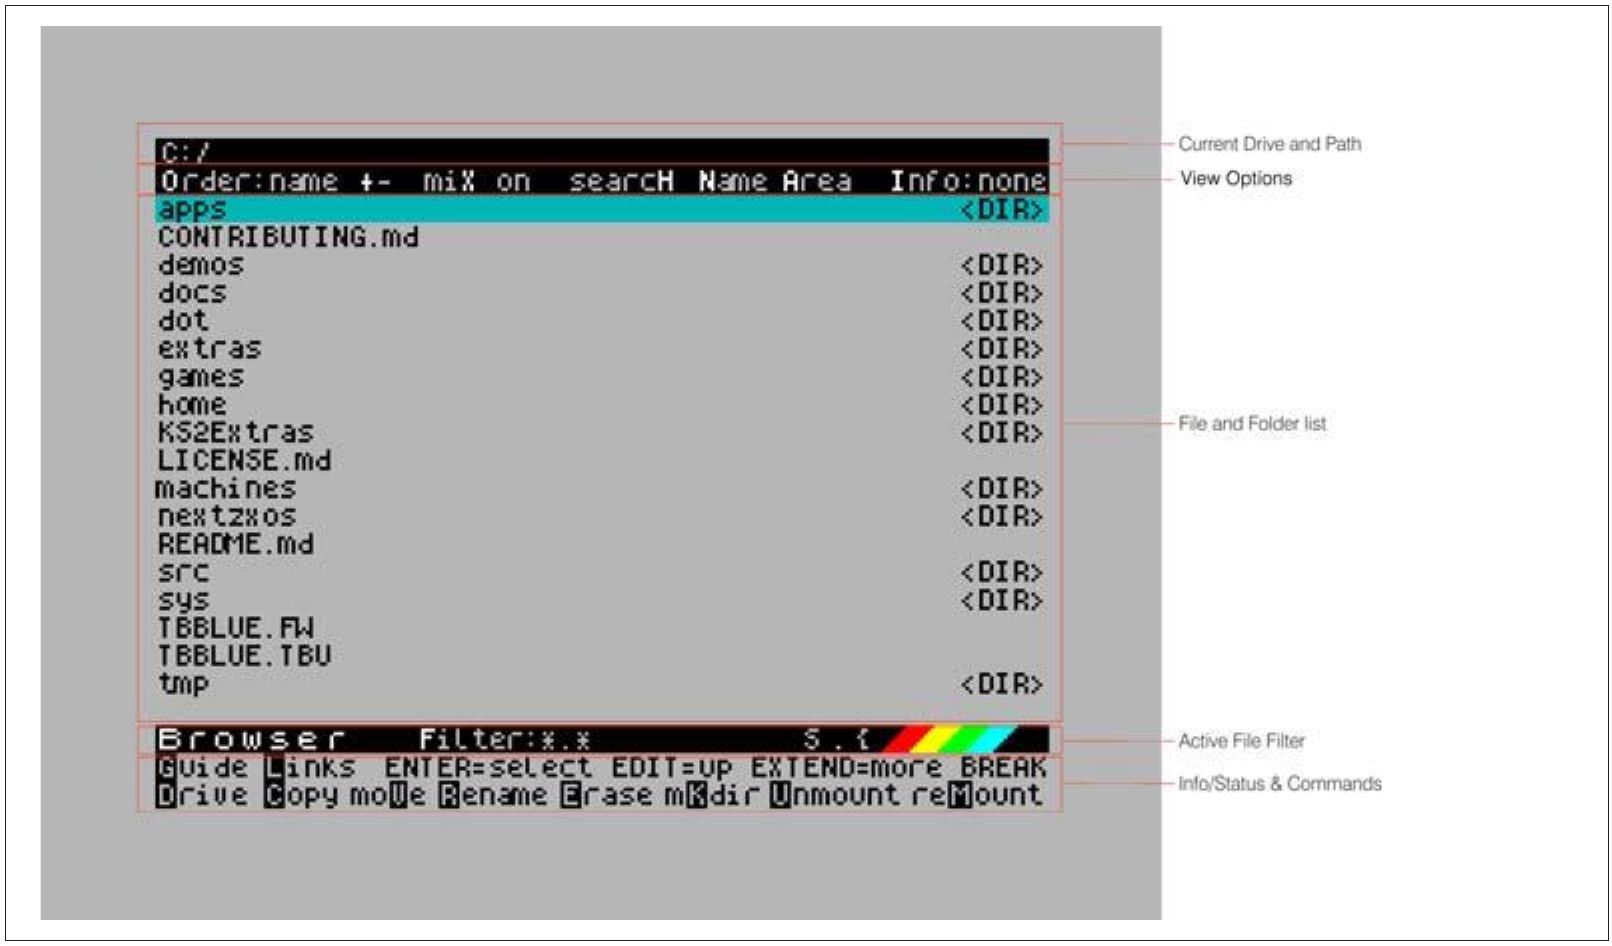
Current Drive and Path
C:/
View Options
Order:name +- miX on searcH Name Area Info:none
File and Folder list
apps                                          <DIR>
CONTRIBUTING.md
demos                                         <DIR>
docs                                          <DIR>
dot                                           <DIR>
extras                                        <DIR>
games                                         <DIR>
home                                          <DIR>
KS2Extras                                     <DIR>
LICENSE.md
machines                                      <DIR>
nextzxos                                      <DIR>
README.md
src                                           <DIR>
sys                                           <DIR>
TBBLUE.FW
TBBLUE.TBU
tmp                                           <DIR>
Active File Filter
Browser Filter:*.* S.{
Info/Status & Commands
Guide  Links  ENTER=select EDIT=up EXTEND=more BREAK
Drive Copy moVe Rename Erase mKdir Unmount reMount
Fig. 22 – Browser window areas and their function
On the top of the Browser window, is the Current Drive and Path Area. As you navigate your drives, it changes to reflect the current drive and folder you're in. This in effect, is the same as giving the PWD command when in NextBASIC.
Right below that are the View Options which control the way the list will appear, from what info it will show to how the list is sorted together with a search control
Immediately after, is the File and Folder List Area; it contains all files and folders at the point you're located as reflected by the Current Drive and Path Area at the top in combination with the Active File Filter Area that's right below it (more about that in a little bit) shown in pages of 19 items at a time. You navigate the file and folder list with the cursor keys, ENTER and EDIT, a joystick set as cursor, or the first Kempston or Mega drive joystick regardless of what port (Left or Right) it's set to. Immediately below the File and Folder List Area, is the Active File Filter Area with which, you can reduce the file list to whatever types (including folders which have essentially a blank type) you wish to see (according to a filter set by wildcards) and finally, the bottom two lines is the Info/Status and Commands Area.
Using the Browser
The Browser is extremely easy to use; all it takes is a few keystrokes to accomplish most tasks. Controls are listed in the next table:
| Key | Description |
|---|---|
| ⇦ | Moves one page up or to the topmost item if you're on the first page |
| ⇨ | Moves one page down or to the last item if you are on the last page |
| ⇧ | Move up one item |
| ⇩ | Move down one item |
| ENTER | If it's a folder, change to that folder. If it's a file attempt to execute it |
| SYMBOL SHIFT + ENTER | Attempt the secondary action stored in browser.cfg for the file type |
| EDIT | Move up one folder |
Table 17 – Browser controls
while commands are the following:
| Key | Description |
|---|---|
| O | Cyclically changes the sorting of the files between None, Name, Size and Date |
| + | Sorts the display Incrementally |
| - | Sorts the display Decrementally |
| X | Toggles whether Folders and Files will be mixed or separate |
| H | Performs a search for a specific file |
| N | Shows the full name of the currently selected object |
| A | Switches User Area |
| I | Toggles the Info display between None, Size, Date and Attributes |
| D | Cyclically changes the drive to the next in the list of mounted drives |
| K | Makes a new Folder |
| R | Renames the currently selected item |
| C | Selects the currently highlighted file for copying |
| E | Erases the currently selected item |
| M | Remounts all drives |
| U | Unmount current drive |
Table 18 – Browser commands
In order to copy a file, you will need to highlight (using the cursor keys) the file and then press C. The status lines will change to: Copy? (Y/N) to which you'll need to reply with a Y or N (for Yes or No). Then you navigate to the new location whether this is on the same drive or on another drive and once you've reached your intended target you will need to press P. The Browser will ask you if you want to Paste here? (Y/N) to which you'll need again to reply with a Y or N. If you attempt to copy a Folder (marked by a <DIR> on the file and folder list) the Browser will still ask: Copy? (Y/N) but it will silently reject any attempt to P(aste) the folder on another location.
Erase also asks a similar question; Erase? (Y/N) will appear after you highlight a file and press E but in the case of a folder it will fail with a Dir Full flashing error displayed in the Status Area if the folder contains any item in it.
Rename, as in the case for the MOVE command we examined previously, does three things: Renames and/or moves a file. You highlight an item and press R, and a New name: prompt appears in the Status Area asking you for a new name (or a new location together with the old or a completely new filename). Rename doesn't work across drives so no drive name is required in case of a move, which means that you can start the new name with a / or \ to indicate the root folder of the current drive. As a matter of fact entering any drive (even the current one) at the beginning of the new name filespec, will fail with a No rename between drives error.
You can Rename/Move a folder to be under another folder, however the latter must already exist otherwise Rename will fail with an Invalid path error.
To make a new folder/directory, the Browser has the M(a)K(e) Dir command, accessible by pressing K on your keyboard. The Status Area will change to display a New name: prompt. The new name must conform to the parameters of a folder filespec as discussed in the MKDIR command section earlier. As is the case with MKDIR, any attempt to create a folder in a drive that doesn't support it will result in a Not implemented error in the Status Area.
The Browser can unmount any drive except drive c: by switching to that drive using D and then pressing U on the keyboard and mount any virtual disk image it knows about (that is: .dsk and .p3d file types) by selecting it and pressing ENTER. It will ask you which drive letter you want to mount it on by displaying a Mount on which drive? (A-P) prompt followed by a [A: is recommended] in the case of +3 disk images. It will then display a Try to boot disk now? (Y/N) prompt. The latter process will try to load special files named * or DISK that exist inside the disk image. If auto booting is not possible a message: Not bootable will appear in the Status Area.
There is no way to remount a single, previously mounted physical drive that you chose to unmount through the Browser. You have, however the option to perform a complete remount operation by pressing M on your keyboard. Once you do that, you'll be prompted to
remove your SD card (this message applies to both SD cards) and once you press Y on the prompt, NextZXOS will perform the REMOUNT command as discussed earlier, thus remounting any physical drives you've unmounted.
Configuring the Browser
File and drive management operations with the Browser is one facet of what it can do. The most important function it has however is to recognise and launch files of various types when we highlight them and press ENTER (or SYMBOL SHIFT + ENTER – see immediately below). It's able to do so due to its extensible nature using a simple, specially formed text file called browser.cfg that's located under c:/nextzxos/. The Browser also offers a way to assign TWO types of launching for a filetype. This is accomplished by adding two lines in browser.cfg. For example we could LOAD a .bas file or convert it to plain text using the .bas2txt dot command. The first action would be launched by ENTER and the second one with SYMBOL SHIFT + ENTER
Each line of browser.cfg contains information formed in the following fashion:
TYPE LINE
where TYPE is a 3 letter file type (e.g. BAS) followed by LINE which is a sequence of NextBASIC commands separated by colon characters as per usual but prefixed with one of the following symbols:
| Prefix | Meaning |
|---|---|
| : | Return to Menu afterwards |
| < | Return to Browser afterwards |
| ; | Return to NextBASIC afterwards |
The NextBASIC commands that follow, use the following placeholders:
| Character | Meaning |
|---|---|
| | | Is replaced by the short filename as read by the Browser18 |
| "| | Is replaced by the long filename as read by the Browser and must be terminated by a matching quote (") |
| £ | Is replaced by language code (ie. en for English, es for Spanish etc) |
Additionally, if a quote character is needed inside the NextBASIC command sequence, it can be escaped using the backwards slash character as follows ".
Wildcards can be used to replace parts of a file type (* for the remainder, ? for only one character)
Browser.cfg can be edited using any standard text editor. More information about the Browser and how to configure it can be found by launching its guide file with:
.guide browser
The Command Line
The NextBASIC editor is excellent for editing large programs, however for single use commands like the ones for file management or the dot commands we have been examining on a case-by-case basis, it can be a bit cumbersome to use, especially since the underlying NextBASIC listing will appear after every direct command. For that reason, NextZXOS includes a special version of the NextBASIC editor, that hides (but does not erase) any NextBASIC program that you may be editing and offers an uncluttered view of the screen making it easier to enter commands directly to the operating system. Unlike other operating systems, the NextZXOS command line still gives full access to NextBASIC and doesn't include a prompt like the one available on CP/M which we'll examine a bit further. To access the Command Line interface, press EDIT to bring up the NextZXOS menu, select Command Line and press ENTER. While in the Command Line interface you have the op-
18 This functionality is recommended with dot commands that cannot deal with LFNs.
tion to change how many columns are displayed by either again calling up the NextZXOS menu with EDIT and selecting the 32/64/85 entry or by directly giving the SPECTRUM CHR$ command that can change the columns displayed immediately. See the SPECTRUM CHR$ entry previously in this chapter for details of usage.
Notes
⚠
WARNING! WARNING! WARNING! WARNING! WARNING!
Disabled Expansion Bus refers to disabled SIGNALS on the Expansion Bus. The
Expansion Bus is CONSTANTLY UNDER POWER and you must ALWAYS PLUG
Interfaces and ROM cartridges with ALL CABLES DISCONNECTED otherwise
IRREPARABLE DAMAGE MAY OCCUR!!!!
WARNING! WARNING! WARNING! WARNING! WARNING!
ROM Cartridge Loaders
For users of ZX Interface 2, Ram Turbo, Dandanator and compatibles, NextZXOS introduces the ability to load ROM cartridge based software directly from the More… submenu and selecting the Interface 2 option. Since the ZX Spectrum Next starts with the expansion bus disabled, it provides a quick way to type the appropriate commands to load either 48K or 128K ROM based software as well as apply all necessary settings to ensure maximum compatibility of cartridge based software. All you have to do is select the appropriate option. NextZXOS, will make the necessary adjustments, enable the bus and load the software.
48K BASIC
The 48K BASIC menu, located in the More… submenu, turns your ZX Spectrum Next to into a standard 1982 ZX Spectrum… with a twist! First of all, according to the Next personality you have selected during boot, you may have full key entry (Looking Glass) instead of token (i.e. the keywords you see printed on your ZX Spectrum Next's keyboard) single-key entry (ZX Standard). Additionally, you have access to all the ZX Spectrum Next's additional features although not from BASIC. Finally you have access to your SD card via the dot commands we've already discussed. You can also reach 48K BASIC using the SPECTRUM command as discussed in a previous section.
128K BASIC
The 128K BASIC menu, located in the More… submenu, turns your ZX Spectrum Next to into a 1985 ZX Spectrum 128K with the extra hardware of the Next available but unlike the 48K option discussed above, the dot commands do not work as esxDOS requires a 48K BASIC (the so called USR 0 mode).
ZX80 and ZX81 BASIC
This is a convenient way to access the ZX80 and ZX81 emulators by Paul Farrow without having to launch a separate personality on boot. There's no way other than reset to come back from the ZX80/81 emulators.
NMI Menu
While in Next mode, pressing the NMI button will launch the NMI menu which provides a lot of useful functionality to your ZX Spectrum Next. The NMI menu traces its lineage back to an expansion interface called Multiface. Multiface, allowed users to pause a program and break into it, create snapshots of the system's memory which upon reload, placed the machine in the same place they were (and running the specific program they were) at the point in time they were, when they saved each snapshot.
The NextZXOS NMI menu offers, however, many more features over those of the original Multiface. We'll examine the most important ones of these below.
Upon loading, we can see the following entries in the menu:
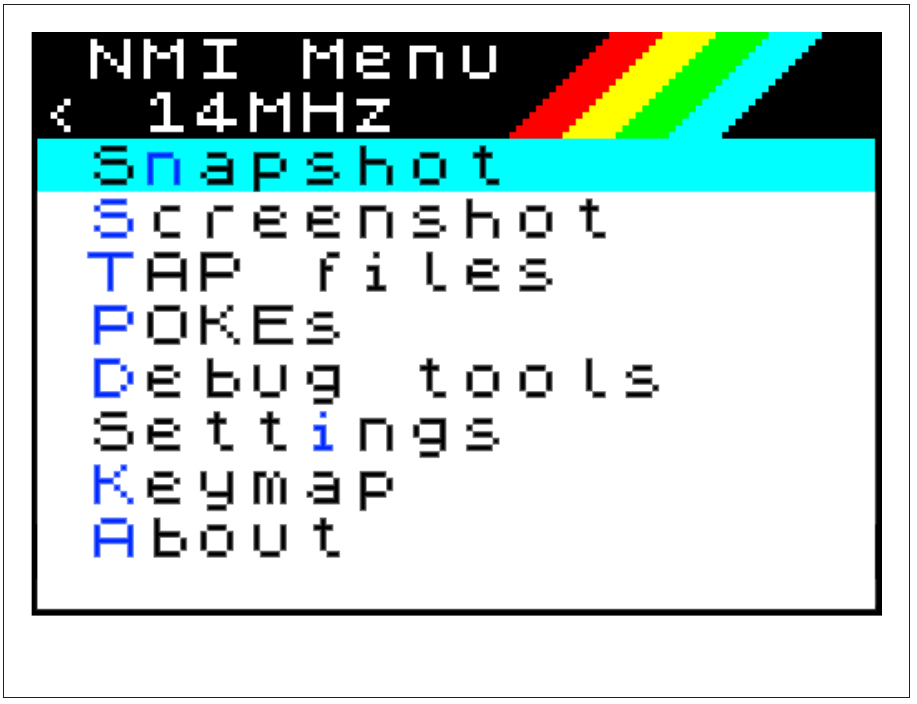
NMI Menu
< 14MHz
Snapshot
Screenshot
TAP files
POKEs
Debug tools
Settings
Keymap
About
Fig. 23 – NMI main menu
Return – turns off the NMI menu and returns you to whatever you were doing prior to pressing the NMI button.
Snapshot – Produces a snapshot of any legacy software that's currently running. It automatically recognises if it's a 48K type or 128K type of software and adjusts the snapshot type produced accordingly.
Screenshot – Produces a screenshot of whatever is in any of the layers' screen memory areas and prints (to a ZX Printer or compatible) a ULA (Layer 0) screenshot. It also saves and restores the current palettes.
TAP Files – Manages the redirection of input and output to drive t: (tape) to virtual tape files (.tap) as well as browses their contents (In essence a shortcut to .tapein, .tapeout and .lstap we've covered previously).
POKEs – Manages and applies .pok files to running software. These are files containing known workarounds and patches to specific applications – used mostly for games; for infinite lives etc.
Debug tools – Gives access to maybe the most powerful set of features in the entire suite: A Next Register and Z80n Register status browser, a memory map and bank browser, the ability to set breakpoints in memory to intercept running code as well as a banked memory save tool.
Settings
< 14MHz
Joysticks
General
Sound
Fig. 24 – NMI Settings
Joystick
< 14MHz
JoyL Kempston1
JoyR Sinclair2
Keyjoy L Setup
Keyjoy R Setup
Fig. 25 – NMI Joystick Settings
Sound
< 14MHz
Stereo     ABC
IntSpeaker On
BEEPer     All
HDMI Sound On
TurboSound On
Covox      On
Audiochip  YM
AY0 Mono   Off
AY1 Mono   Off
AY2 Mono   Off
Fig.26 – NMI Sound Settings
Settings – Allows easy modification of hardware settings on-the-fly, from the ones available on the configuration menu to the ones that are more nuanced (like the type of DMA chip in use or the machine timings used in the specific personality) which aren't always available through the standard configuration (Fig. 24 through 27).
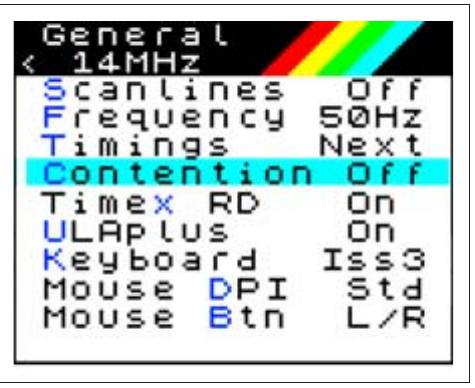
General
< 14MHz
Scanlines  Off
Frequency  50Hz
Timings    Next
Contention Off
Timex RD   On
ULAplus    On
Keyboard   Iss3
Mouse DPI  Std
Mouse Btn  L/R
Fig. 27 - NMI General Settings
Keymap – This is a duplication of the .keyhelp dot command and provides a quick on-screen legend of the keyboard tokens (for the 48K mode) which is particularly useful if using a board-only Next or a PS/2 keyboard.
About – Displays a NextZXOS About screen with several credits to contributors of bug reports and suggested features.
The NMI menu, uses the familiar Browser interface dialogs for loading and saving of files as needed as can be seen in the next figure.
The NextZXOS folder structure
To achieve a complete and properly booting NextZXOS the following folders and files need to be present on an SD Card:
At the root level there's the Firmware file (TBBLUE.FW) and the folders c:/nextzxos/ carrying all the drivers (RTC, Mouse etc), support programs and overlay files as well as the base CP/M image file together with the startup command file autoexec.bas.
Then there is c:/machines/next/ which contains two versions of the NextZXOS ROM (they differ in the type of 48K ROM they contain; Sinclair or Looking Glass), the NextZXOS divMMC ROM, the NMI ROM as well as the configuration file config.ini which tells the Firmware the particular settings you require for your machine.
Finally, there is c:/dot/ which contains, apart from the third party dot commands, the ones that constitute part of NextZXOS, namely: .$, .bas2txt, .browse, .browseprefs, .cpm, .defrag, .editprefs, .guide, .install, .lfn, .mem, .mkdata, .mkswap, .nextver, .txt2bas, .uninstall and .unzip.
To obtain just a booting NextZXOS you do not need the dot commands, CP/M base image, mouse driver, RTC driver or even autoexec.bas and NMI rom. Your functionality however will be limited.
NextZXOS dot commands
We have talked about dot commands, covering each one as the case dictated, but we haven't talked about what they actually are! Well, dot commands are basically an easy way to add functionality to NextBASIC (and ZX BASIC) originally invented for use by esxDOS by its author, Miguel Guerreiro. Copying from the z88dk19 documentation by Allen Albright: A dot command is loaded into an 8 K ram page located at address 0x2000, overlapping the rom, and can run without disturbing the basic system. They are launched from basic by typing their names with a leading dot, hence the name "dot command". Any string following the dot command's name is passed as a command line. On return the dot command can generate esxdos errors in the basic system, either canned ones or custom ones.
NextZXOS has extended the scheme while remaining compatible with the original specification, thus a separate set of dot commands is included with System/Next™, than what comes with esxDOS. See the esxDOS section below for more details on the differences.
The scope of this manual is a bit limited to cover dot commands in their entirety but you can visit: https://github.com/z88dk/z88dk/tree/master/libsrc/_DEVELOPMENT/EXAMPLES/zxn/dot-command to find out more about how they work and how you can write your own.
NextZXOS, apart from the third party ones included in the System/Next™ distribution, has several dot commands that perform special functions not covered elsewhere. These are:
.$ Dot commands cannot accept string arguments from NextBASIC, so .$ allows execution of a dot command accepting any parameter passed as a string thus enabling full integration of dot commands in NextBASIC
.bas2txt and .txt2bas NextBASIC is stored in a tokenised form. That means that each keyword occupies one token (see Appendix A for these values).
19 z88dk is a C-based cross-development system for a variety of Z80 compatible CPUs and systems.
That further means, that it's only machine and not human-readable other than from within the NextBASIC Editor. These two dot commands allow NextBASIC to be exported to a text file to be edited by a more specialised programmer's editor, or shared with other, non Sinclair computers and imported back in a form that the NextBasic Editor can understand.
.browse One of the nicest features of the Browser is its built-in file dialogs. .browse allows these to be used within your NextBASIC programs and pass the selected file to a string variable in your program saving immense amounts of time from programming menu-based navigation.
.defrag NextZXOS provides a streaming API which can be used for audio or video. If the files however are not defragmented, streaming is interrupted. .defrag solves this problem rearranging the file in question to be in one, continuous, piece.
.editprefs /.browseprefs NextZXOS's native customisers for the editor and the browser.
.guide .gde is the official documentation NextZXOS file format and NextGuide is its viewer. It's a hypertext viewer partially compatible with the Amiga Guide Format
.install/.uninstall These are the dot commands to install and remove drivers like for example the mouse driver from the system. NextZXOS provides a driver API, which you can use to write your own drivers which is used in conjunction with the new DRIVER command.
.lfn This is a very special use case command; its sole purpose is to return the long file name for a short (8+3) filename. .lfn does not work on IDEDOS/+3DOS drives, or rather it does work but returns the same name as +3DOS drives only accept 8+3 filenames.
.mem Returns the free memory for NextZXOS and NextBASIC use
.nextver Assigns the current version of NextZXOS to a variable we specify.
.unzip Native decompressor for .zip archives
Notes
Any errors generated by a NextZXOS dot command generate an error code of 255 (Dot
Command Error) which can be read with the ERROR. ERROR$ and ERROR TO
commands. Refer to Chapter 1 for details.
Modifying the startup – Autoexec.bas
NextZXOS provides you with a very fast way to set up your NextBASIC and NextZXOS environment upon boot by using commands stored in a special file called autoexec.bas located inside the c:/nextzxos/ folder. The same rules apply as with regular SAVE, meaning you will need to give a LINE parameter to save it before it can auto execute. If you omit the LINE parameter, the commands will auto load upon boot but won't execute. For example to set up a red background with bright white letters upon boot:
10 SPECTRUM PAPER 2: SPECTRUM
   BRIGHT 1: SPECTRUM INK 7
20 ERASE: REM ERASES ALL LINES
Then
SAVE "c:/nextzxos/autoexec.bas" LINE 10
Reset and... magic!
CP/M
The ZX Spectrum Next supports running CP/M Plus (also known as CP/M 3.0), an operating system available for many microcomputers in the late 1970s and early 1980s.
CP/M provides a command-line environment similar to MS-DOS. A huge amount of software was available for it, including programming languages, both interpreted and compiled, word processors (such as the well-known WordStar), spreadsheets, databases, utilities, text-based games and much more.
The ZX Spectrum Next runs CP/M Plus using a specially-written BIOS (Basic Input/Output System) which gives it a 80 x 24 text-based terminal supporting full colour.
To run CP/M, you need to call up the NextZXOS Startup menu, go to the More... submenu and select the CP/M option or from NextBASIC or the Command Line, use the dot command .cpm.
Any software, compatible with CP/M-80, CP/M 2.2, CP/M 3.0 or CP/M Plus will work on the ZX Spectrum Next's flavour of CP/M except CP/M-86 software (which requires an Intel x86 processor) and CP/M-68 software (which requires a Motorola MC68K class processor).
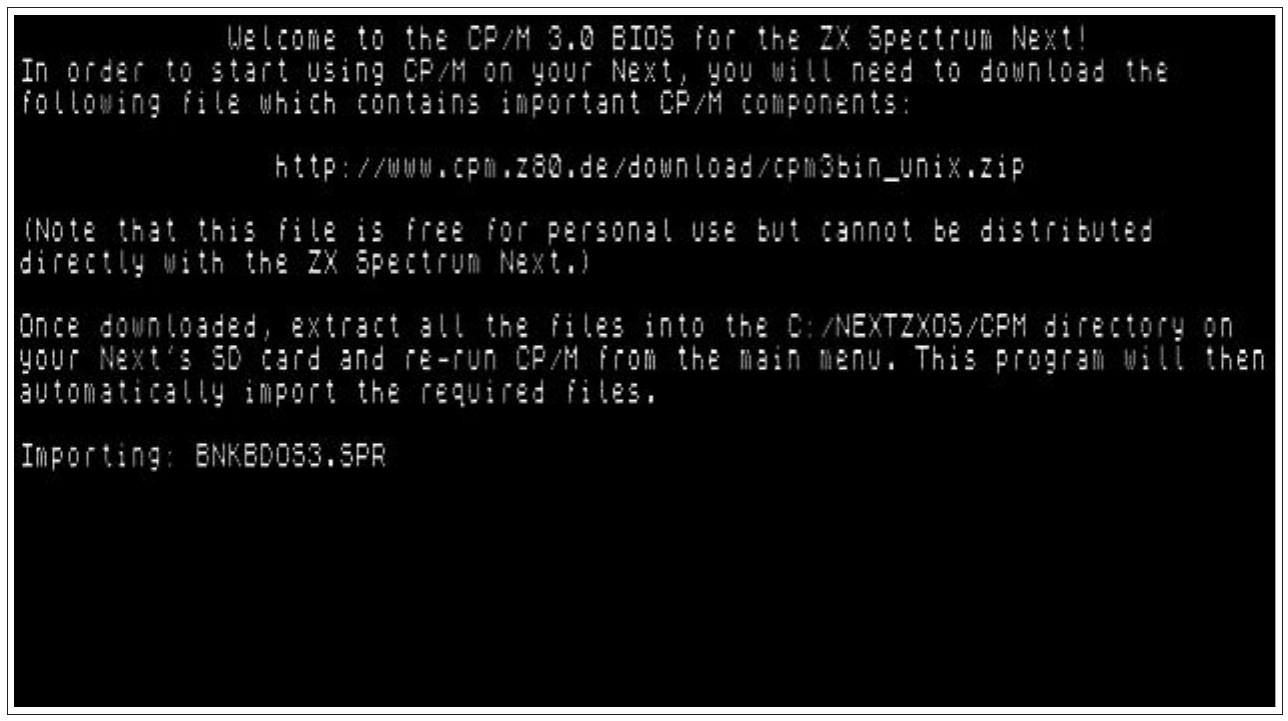
             Welcome to the CP/M 3.0 BIOS for the ZX Spectrum Next!
In order to start using CP/M on your Next, you will need to download the
following file which contains important CP/M components:

                http://www.cpm.z80.de/download/cpm3bin_unix.zip

(Note that this file is free for personal use but cannot be distributed
directly with the ZX Spectrum Next.)

Once downloaded, extract all the files into the C:/NEXTZXOS/CPM directory on
your Next's SD card and re-run CP/M from the main menu. This program will then
automatically import the required files.

Importing: BNKBDOS3.SPR
Fig. 28 – Initial CP/M setup procedure
Please note that CP/M graphical applications requiring GSX cannot be used at the moment, although support for these is under consideration. This is not affecting software availability considerably, as there is very little software requiring GSX; most CP/M software was text-based.
Getting started
Before you can use CP/M, NextZXOS will need to prepare it. This is a process that happens automatically just once. You will need to access your NextZXOS Startup Menu, then from the More... option, select the CP/M submenu. NextZXOS will start working on its own and once it finishes, it will exit back to NextZXOS. From then on, every time you choose the
CP/M option from the More... submenu in the NextZXOS Startup Menu, or type .cpm in the NextBASIC Editor or the Command Line will take you straight into CP/M (Fig. 29).
CP/M Plus COPYRIGHT 1998, CALDERA, INC.   101198
CP/M Plus BIOS (v0.91) for ZX Spectrum Next (c) 2019, Garry Lancaster

60.5K TPA

A>
Fig. 29 – ZX Spectrum Next properly booted CP/M setup
Commands
CP/M is operated by typing commands at the prompt (A>). One of the most useful commands is DIR which works much in the same way that CAT works in NextZXOS.
Typing:
DIR A:
will show a list of all the files on the current drive or the drive specified. Initially you will just have drive A: available, but more can be set up (drives A: to P: can be used) using the .mkdata dot command in NextZXOS as per the instructions provided earlier, so that you can keep different programs on different drives.
Any filename shown by DIR which ends in .COM is itself a command, and can be executed at the prompt. You will have noticed there are a lot of .COM files to try. Another useful one is:
HELP.COM
which provides help and information on all the standard commands and utilities provided with CP/M. Note, that you do not need to type the .COM part all the time; CP/M will find the appropriate command and executed without having to type its extension (in other words its file type). So to call up HELP.COM you could just type:
HELP
Commands are also case-insensitive, so it doesn't matter if you type them in lower or upper case or a mix of both; all versions of HELP, help, hELP and HelP will call the exact same program!
In the CP/M distribution that comes with NextZXOS, there are a number of commands specific to the ZX Spectrum Next. These include:
| Command | Description |
|---|---|
| UPGRADE | Upgrades your installation of CP/M from the latest version available on your SD card |
| TERMINFO | An interactive demonstration of the terminal facilities provided on the ZX Spectrum Next |
| EXIT | Exits from CP/M and returns to NextZXOS |
| Command | Description |
|---|---|
| COLOURS | Changes the colour scheme |
| TERMSIZE | Changes the default terminal size (up to 80 x 32) |
| IMPORT | Imports files from your NextZXOS c: drive (or other FAT drives seen in the NextZXOS browser) |
| EXPORT | Exports files to your NextZXOS c: drive (or other) |
| ECHO | Sends text or escape sequences to the terminal |
| NEXTREG | Views or changes ZX Spectrum Next hardware registers (use at your own risk!) |
Typing the name of these commands will give some more information on how to use them.
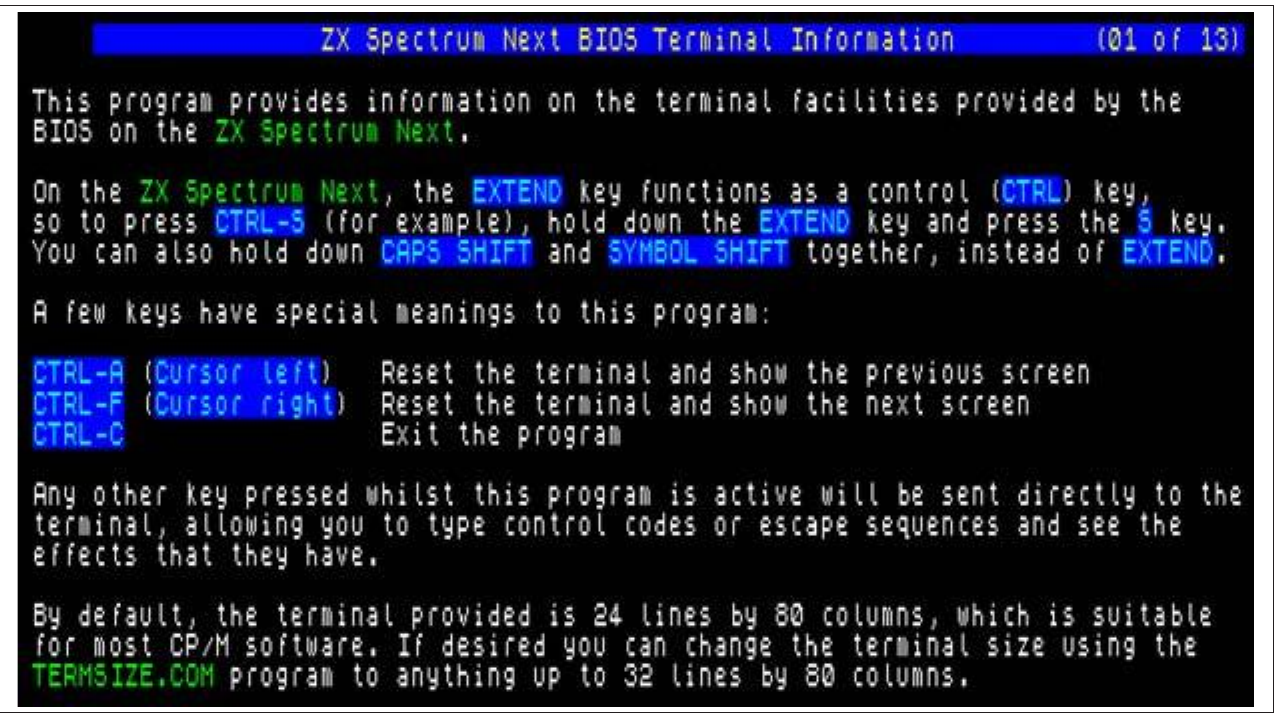
                   ZX Spectrum Next BIOS Terminal Information         (01 of 13)

This program provides information on the terminal facilities provided by the
BIOS on the ZX Spectrum Next.

On the ZX Spectrum Next, the EXTEND key functions as a control (CTRL) key,
so to press CTRL-S (for example), hold down the EXTEND key and press the S key.
You can also hold down CAPS SHIFT and SYMBOL SHIFT together, instead of EXTEND.

A few keys have special meanings to this program:

CTRL-A (Cursor left)   Reset the terminal and show the previous screen
CTRL-F (Cursor right)  Reset the terminal and show the next screen
CTRL-C                 Exit the program

Any other key pressed whilst this program is active will be sent directly to the
terminal, allowing you to type control codes or escape sequences and see the
effects that they have.

By default, the terminal provided is 24 lines by 80 columns, which is suitable
for most CP/M software. If desired you can change the terminal size using the
TERMSIZE.COM program to anything up to 32 lines by 80 columns.
Fig. 30 – TERMINFO output
Drives and CP/M
CP/M on the ZX Spectrum Next cannot access the standard SD card drive c: (or other drives you may have due to having additional SD cards inserted, for example). This is because CP/M directly accesses disks at a low level, and is incompatible with FAT filesystems.
Therefore, on the ZX Spectrum Next, CP/M uses virtual disk files. These can either be .p3d files (created by the .mkdata dot command) or .dsk files (images of standard ZX Spectrum +3 disks).
You can access multiple disk images at once in CP/M. To do this, simply create additional files with .mkdata using the same naming scheme. eg. at the NextZXOS command line, type the following:
.mkdata "/nextzxos/cpm-b.p3d"
.mkdata "/nextzxos/cpm-e.p3d"
When you next use CP/M, you will have drives A:, B: and E: available. Note that you can have a drive C: in CP/M if you wish, but this is not the same as the c: drive used in NextZXOS.
Up to 15 virtual disk images can be used at once by CP/M, and they can be mapped to any drive A to P, simply by naming the files in any of these ways:
c:/nextzxos/cpm-X.p3d
c:/nextzxos/drv-X.p3d
c:/nextzxos/cpm-X.dsk
c:/nextzxos/drv-X.dsk
where X is the drive letter, from A to P. If you have created multiple files referring to the same drive letter, CP/M will use the ones named cpm-X in preference to the ones named drv-X. It has no preference over .p3d or .dsk, so if there is a cpm-b.p3d and a cpm-b.dsk, then the first one in the directory will be used.
Note that NextZXOS will also automatically mount these drive images (except any image where X is c) when it starts up. You can view them in the Browser (press D to change drives) and copy files between them etc. NextZXOS will mount drv-X files in preference to cpm-X files. You can also manually mount other disk images which don't follow the automatically-mounted naming scheme. To do this, just press ENTER on the .p3d or .dsk file in the Browser.
                      WordStar, CP/M Edition, Release 4
                           O P E N I N G   M E N U
     D open a document                    L change logged drive/user
     N open a nondocument                 C protect a file
     P print a file                       E rename a file
     M merge print a file                 O copy a file
     S check spelling of document         Y delete a file
     I index a document                   F turn directory off
     T table of contents                Esc shorthand
     X exit WordStar                      R run a program
     J help
DIRECTORY   Drive A
ALIAS.CMD      CHAPTER1.DOC   CHAPTER2.DOC   CHAPTER3.DOC   CONFIG.LBR
DIARY.DOC      DISK           DISK1          DISK2          DOCFILES.LBR
FCP.LBR        HELP.HLP       HLPFILES.LBR   HOMONYMS.TXT   HYEXCEPT.TXT
LSH.WZ         MAINDICT.CMP   PATCH.LST      PATCH4SK.HEX   PATCHSK.SUB
PRINT.TST      RCP.LBR        READ.ME        README         RELEASE.NOT
RULER.DOC      SAMPLE1.DOC    SAMPLE2.DOC    SAMPLE3.DOC    TABLE.DOC
TCAP.LBR       TCJ.INF        TCJ25.WZ       TCJ26.WZ       TCJ27.WZ
TCJ28.WZ       TCJ29.WZ       TCJ30.WZ       TCJ31UPD.WZ    TCJ32.WZ
TCJ33UPD.WZ    TEXT.DOC       WSINDEX.XCL    Z3PLUS.LBR     Z3TCAP.TCP
ZFILEB38.LZT   ZFILER.CMD     ZHELPERS.LZT   ZNODES66.LZT   ZSYSTEM.IZF
"VERS""1.02F   "Z3PLUS        ""C"1988
Fig. 31 – ZX Spectrum Next CP/M running WordStar 4
Further information
There is a lot to learn about CP/M, and a lot you can do with it. Some useful places for further information are listed below:
http://www.cpm.z80.de/ Contains a lot of manuals, documentation and software.
In particular, the CP/M 3 User Guide, Command Summary and Programmers' Manuals can be found in the following locations:
| http://www.cpm.z80.de/manuals/cpm3-usr.pdf | User Guide |
| http://www.cpm.z80.de/manuals/cpm3-cmd.pdf | Command Summary |
| http://www.cpm.z80.de/manuals/cpm3-pgr.pdf | Programmer's Manual |
A good starting point is also:
http://classiccmp.org/cpmarchives/ which links to many more useful sites, collections of software, manuals, magazines and much more.
Preparing your ZX Spectrum Next for esxDOS
Other than NextZXOS, CP/M and +3e/IDEDOS, your ZX Spectrum Next supports natively one more Operating System called esxDOS. This is especially helpful when running Eastern European software as the preferred method of storage is using TRDOS which esxDOS supports natively. Unfortunately the copyright status of some parts of esxDOS prohibits its inclusion in the System/Next™ distribution, but that doesn't mean you cannot install it yourself. esxDOS can be invaluable for personalities other than the Next Native one as it provides older model personalities with an easy way of managing FAT formatted SD cards. As is the case with NextZXOS, it too uses FAT as the primary filesystem and thanks to NextZXOS' design, it can therefore co-exist on the same drive without clashes.
In order to install esxDOS you need to do a few things first:
- Go to www.esxdos.org and download either the latest version or the one whose rom comes with the System/Next distribution. For correct operation, the minimum supported version is 0.8.6 beta 4
- Using a PC, Mac or Linux machine, unzip the contents of the esxDOS distribution onto a drive, connect the System/Next™ SD card onto the same computer and then do the following:
- Copy the BIN, SYS and TMP folders into the System/Next™ distribution's root folder
- Copy the ESXMMC.BIN file from the esxDOS root to c:/machines/next/
- Finally, edit the config.ini file in c:/machines/next/ to include esxDOS with the personality you choose (Note that this doesn't apply to Next Native mode)
Here is an example that will modify config.ini to use esxDOS with the 128K personality (note that esxDOS will boot any 128K personality in what is called USR0 mode; a special mode where the editor is 48K but all the 128K features are available). After you download the esxDOS distribution archive from the esxDOS site, unpack it and follow the instructions above. Then go to c:/machines/next/ and using any text editor (for example Notepad under Windows) open config.ini. Locate the line reading:
menu=ZX Spectrum 128k,1,8,128.rom
and modify it as follows:
menu=ZX Spectrum 128k,1,8,128.rom, esxmmc.bin,<none>
Also, if you have an RTC chip installed, go to c:/nextzxos/ and copy RTC.SYS to c:/sys/. Save it, eject the SD card and transfer it to your ZX Spectrum Next. Upon boot, press SPACE and then using the cursor keys, locate the ZX Spectrum 128k line. Press ENTER and in a few seconds you'll see something like this:
esxDOS             v0.8.6-DivMMC
                     © 2005-2013
                   Papaya Dezign

Detecting Devices...

sda: Next

Mounting drives...

hd0: NO NAME, FAT16, 31744KB

Loading ESXDOS.SYS...      [OK]
Loading RTC.SYS...         [OK]
Loading NMI.SYS...         [OK]
Loading BETADISK.SYS...    [OK]
Fig. 32 – ZX Spectrum Next running esxDOS 0.8.6
That was it, you now have a functioning esxDOS installation for your 128K personality on your ZX Spectrum Next computer and the green Drive button on the left side of your computer will start functioning calling the esxDOS browser.
ZX Spectrum Next User Manual, 3rd Edition (ISBN 978-1-5272-5496-1), written and illustrated by Phoebus R. Dokos. Copyright © 2020-2024 Phoebus Dokos / SpecNext Ltd. Licensed under CC BY-NC-SA 4.0. This is a transcription and can contain errors; check any doubt against the printed page.